Chemistry
Looking for the list of chemicals with their recipes and effects? It has been moved to Chemicals.
This is where scientists go to brew up chemicals. Gets set on fire every other twice a round.
| Chemistry | |
| Location | |
|---|---|
|
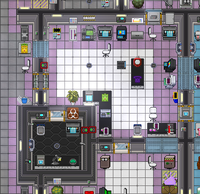
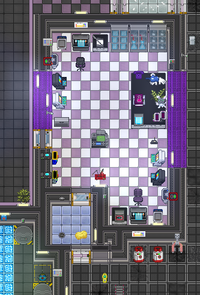
Breeding ground for weapons of mass destruction and pizza-infused smoke clouds alike. | |
| Chemistry | |
| Location | |
|---|---|
|
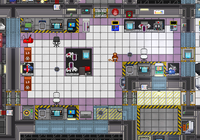
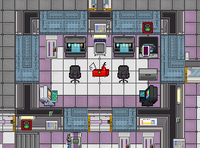
Breeding ground for weapons of mass destruction and pepperoni-infused smoke clouds alike. | |
| Chemistry | |
| Location | |
|---|---|
|
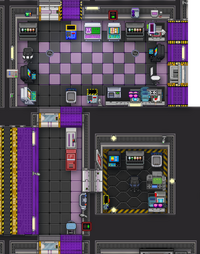
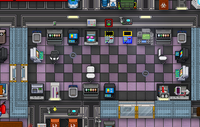
Breeding ground for weapons of mass destruction and cheese-infused smoke clouds alike. | |
| Chemistry | |
| Location | |
|---|---|
|
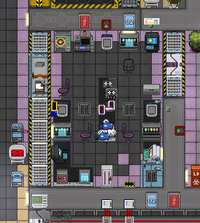
Breeding ground for weapons of mass destruction and spider-infused smoke clouds alike. | |
| Chemistry | |
| Location | |
|---|---|
|
Breeding ground for weapons of mass destruction and Yorkshire-sauce-infused smoke clouds alike. | |
| Chemistry | |
| Location | |
|---|---|
|
Breeding ground for weapons of mass destruction and space-drugs-infused smoke clouds alike. | |
| Chemistry | |
| Location | |
|---|---|
|
Breeding ground for weapons of mass destruction and sparkles-infused smoke clouds alike. | |
|
Research Director, Scientist, Medical Director, Medical Doctor, Roboticist, Geneticist, Head of Security, Security Officer, Detective, Janitor | |
Oh boy I can't wait to melt my eyebrows off!
Here's a quick look at the devices scattered across the room.
Machines & Storage
| Name | Image | Description |
|---|---|---|
| Chem Dispenser | Dispenses a whole slew of chemicals. Use a beaker (or similar liquid-bearing containers - however, you cannot insert some such as drinking glasses) on it to insert it, then use the machine to pick chemicals. You can choose to remove unwanted chemicals (isolate removes all chemicals BUT the selected one). When you're done, eject the beaker from the menu. Can be figured to automatically dispense certain chems using chem groups/bookmarks. | |
| Reagent Extractor | Converts certain items (usually food items or plants but not always) into chemical reagents that are stored into one of two internal tanks or an inserted container. The two internal chemical tanks hold 500 units of chemicals, helpful when you need to store a large amount of | |
| Large Orbital Shaker | Making a chemical that requires a physical shock (e.g. styptic powder)? Let the large orbital shaker do it for you. First, click on the shaker while holding a container. It takes up to four containers but does not accept ones used for drinking. Next, click on the shaker with an empty hand to turn it on. As it shakes, it continually applies a physical shock (equivalent to a 5-damage attack). Once you're done, just click on the shaker again to get your container(s) back. Don't forget to turn it off. When emagged, the machine is less a shaker and more a thrower. Instead of shaking containers, it flings them on it all across room in random directions. (This technically counts as a physical shock.) You can't turn it off (and emagging it also automatically turns it on), and since emagged shakers consume five times as much power, you might face some power issues. | |
| Heating/Cooling Unit | Used to chill or heat containers. Use the menu to set a target temperature (Tip: click the number itself to punch in a number instead of clicking + and - over and over again.), and press Activate to start the heating/cooling process. | |
| CheMaster 3000 | Used to turn chemicals into pills, medical patches, medicine bottles, and more. You can click on the pill/bottle/etc. images to unlock more options, like specific designs; this is also how you make custom canned drinks (which share styles and covers used by random colas) and ampoules. When creating pills, patches, or ampoules, you'll be prompted to choose how many units are in each one (multiple pill/patch options only), as well as the label (which will show up as "<what you wrote> pill/patch" or "ampoule(<what you wrote>)"). Pill bottles and patch boxes work slightly differently from other containers. To get a pill or patch, click on the bottle resp. box with an empty hand while it is in your other hand. Pill bottles can be emptied by clicking the bottle with the hand holding it, dumping all pills on the floor. Patch boxes have to be opened before you can manipulate the contents.
It also comes with many other features. It can also isolate or remove reagents from the inserted beaker. If you need more information, click the Analyze option next to the reagent name, and the CheMaster will give a brief description of what it is along with any non-secret recipes to make it. The Analyze option can also conduct blood tests if you lack other tools (reagent scanner, upgraded health analyzer): draw blood and analyze it with the CheMaster in the pharmacy. | |
| ChemiCompiler | A complicated chemistry device, which uses a programming language derived from Brainfuck. It features 5 registers, 1024 bytes of RAM and 10 reagent reservoirs - to add beakers, click on the r[number] slots. The machine generates a pill or vial if they are targeted and can send reagents out an ejection port. There exists a handheld version used by the Syndicate that behaves identically but has only 6 reservoirs. For instructions on how to use it, see the dedicated ChemiCompiler guide. | |
| Lab Counter | Surprisingly functional science storage! Has a whopping thirteen slots for your beakers, bottles, pills, syringes, tools, and other small- and tiny-size items in its table drawer. Click-drag its sprite onto yours or click on the counter with an empty hand to access them. You can sometimes find parts for them in Furnishings Crates from Cargo. | |
| Chemistry Glass Recycler | Put glass shards, glassware, and blocks of glass or similar materials (from a portable reclaimer into it to make other, bigger types of glassware. Boxes or containers of glassware can also be emptied into the recycler as well, saving time when recycling the boxes of small beakers into more useful large beakers. Unlike the kitchen version, this has a much more limited variety of glassware. It can only produce the following:
| |
| ValuChimp | Dispenses monkeys, a valuable commodity for the modern scientist. This can be hacked to also offer 1 to 20 bananas and 1 to 2 vocal translators. | |
| Chemical Request Console | Other crew members can request certain chemicals from this chemical request console, located outside research, in the Cargo Bay, and in Medbay. After swiping their ID (not required for Cyborgs and AIs), users can choose from a list of several chemicals (though it excludes various cocktails and secret chemicals), specify an amount (up to 400 units), and add a note. Handily, the machine automatically sends the user's name, their job (both based on ID), and the location where the request was made. | |
| Chemical Request Display | Displays requests for chemicals made from the corresponding consoles. Incoming requests trigger an alert to all research PDAs, so you know to check the console to find the clown's request for 400u of space lube. You may find the mail chutes useful for delivery. | |
| Chemical Barrel | Stores up to 4000u of chemicals and functions like a tank. Comes in three varieties, red, yellow, and blue, all of which can be made at a science fabricator.
| |
| Dispensary Supply Chute | A special computer/chute combo that connects directly to the medbay. By having a chemist place in suitable medicines into the chute, the items are transported through mail pipes to the medbay, where medical doctors can pull out and use the products. The monitor can be used to see view the current supply of the Interlink. |
Tools & Equipment
| Name | Image | Description |
|---|---|---|
| Beaker | Holds chemicals. Standard ones hold 50 units, large ones 100 units. You can make more at a kitchen or chemistry glass recycler and find them in beaker boxes; you can order more beaker boxes from Cargo through both general Chemistry Resupply Crates and precursor Chemistry Resupply Crates. Has quite a few interactions:
Note: Generally, the exact contents of beakers and other reagent containers can't be examined directly. A pair of spectroscopic goggles or a reagent scanner (PDA or separate) are recommended. | |
| Condenser | Holds 100u of reagents like a beaker, but also:
Three condensers spawn in every "auxiliary supply lab counter", located in the chemistry lab. If you need more condensers for your glass jungle, you can always make them at a science fabricator. | |
| Fractional Condenser | Similar to a condenser, but it has color-coded ports that allow you to isolate different products, instead of simply separating products from reactants. Can be made at a Science Fabricator. | |
| Dropper Funnel | Transfers chemicals at a set rate for precise control of reaction speed. As with condensers, you need to hook it up to other containers first, via click-drag. Afterwards, simply click on the dropper funnel to open it, adding its contents to every connected beaker at the given flow rate. It holds 100u of reagents, it accepts lids, and using this item in-hand or hitting it with a screwdriver will allow you to modify the flow rate, which can range from 1 to 10 (no decimals). Can be found in the IgniChem (if your map has one) and manufactured at a science fabricator. | |
| Portable Chemical Dispenser | Not a tabletop-sized chem dispenser, but more like an advanced dropper funnel. Instead of transferring contained reagents, it synthesizes 1-5 units (whole numbers only) of a single basic reagent every 4 ticks. You can change the reagent and amount synthesized by using it in-hand or clicking on it with a screwdriver. Science does not start with these, but you can make them at the science fabricator. | |
| Beaker Lid | Can be applied to a beaker to seal it, making it act as a closed container for the purposes of reactions. This can be very useful if, for example, you don't enjoy breathing Cyanide. If you need more, you can make 7-unit batches at a science fabricator, provided you have a rubbery substance. | |
| Bunsen Burner | One item of glassware can be placed on it at a time to heat the reagents inside. This is much less precise than the Heating/Cooling Unit, but unlike that machine, it can connect to other glassware and heat containers placed in the world. Unlike in your school chemistry classes, it does not need fuel, natural gas or otherwise. Clicking on it with an empty hand will open the context menu, allowing you to choose the flame level: | |
| Reagent Scanner | Assesses chemical composition of many things. Click on a person, container, fluid puddle or other object with this, and it'll list the chemicals inside it. Only the hand-held version has a memory function (click on it or examine to see the results of the previous scan), but it is otherwise identical to the PDA program. | |
| Spectroscopic Scanner Goggles | Assesses chemical composition of containers. Examine a beaker or other reagent container with these on to assess the exact composition and quantity of chemicals inside. Without these, you'll only see a rough estimate and description. These goggles are also available from the cargo bay. | |
| Syringe | Transfers chemicals. Click on the syringe while it's in your hand to set to inject or draw, and click on someone/something to transfer 5 units of chemicals at a time. Drawing from a person will take a blood sample. Neither are instant, unless the recipient is yourself. Total capacity is 15 units. | |
| Dropper | Transfers chemicals. Click on a beaker or other container to load it with reagents, click on another container to squeeze the reagents in. You can also drop it on a person to drip reagents onto them. Holds up to 5 units, and drops all of it at once onto its target. Dropping takes about half as much time as injecting with a syringe. | |
| Mechanical Dropper | More precise dropper. Allows you to transfer reagents (up to 10 units) in increments of 0.1 units. Click on it in-hand to adjust how much is transferred and whether the dropper is in dropping or drawing mode. Otherwise used just like the dropper. |
IgniChem
The IgniChem vends glassware and other tools for working with chemicals. Contrary to the Examine text, it does not offer any chemical precursors. However, it is indeed "ID-selective". By default, only people with Chemical Lab access can use it, which includes science personnel like the Research Director, Scientists, and Research Trainees, as well as the Head of Security, Security Officers, the Head of Personnel, and, of course, the Captain. When hacked, it can also provide street stimulant pills, ???/"cyberpunk" drugs filled with all sorts of adulterants, and a bottle of nasty poison.
Currently, this is only found on Atlas.
| Icon | Quantity | Item | Hidden item? |
|---|---|---|---|
| 2 | Mechanical dropper | No | |
| 5 | Dropper | No | |
| 15 | Beaker (50 unit version) | No | |
| 10 | Large beaker | No | |
| 3 | Chemical condenser | No | |
| 1 | Fractional condenser | No | |
| 3 | Dropper funnel | No | |
| 2 | Bunsen burner | No | |
| 10 | Beaker lid | No | |
| 5 | Syringe | No | |
| 5 | Reagent scanner | No | |
| 1 | Cytotoxin bottle (30 units of cytotoxin) | Yes | |
| 1 | Pill bottle (???) (5 pills with semi-randomized contents) | Yes | |
| 1-6 | Crank pill (10 units of crank in each) | Yes |
Ok so how do I make napalm?
Safety First
Hold your horses, pyromaniacs. First things first, we need to discuss some important... *groan* safety tips:
- Mix potentially-explosive chemicals in the Test Chamber. The Test Chamber is a chamber with reinforced walls and floors, built to withstand small explosions during mixing and testing Thus, it can take much more damage during chemical accidents than the chemistry lab. Keeping other scientists and the mixing lab out of the collateral damage is one less reason for them to
murder youleave you to fry from your own fireball for potentially ruining their round. And if you can't mix the explosive stuff in another room, at the very least warn your colleagues before you do it. - Always wear your standard-issue gas mask and a biosuit + bio hood from the closets. This can't be stressed enough; some chemicals are accompanied with a "The solution generates a strong vapor!" message upon successful mixing, giving everyone adjacent to the tile a big whiff of the chemical that was just mixed on it. The full gas mask/biosuit set immunizes you to this and most chemical smokes and TOUCH reactions, protecting you from your colleagues' shenanigans as well as your own. There is no reason not to do this unless you're trying to choke on your own poisons.
- Don't mix random chemicals Similar to real life, if you aren't careful, you might cause a fire, explosion, implosion, and/or flash or catch a whiff of some toxic fumes. This is why it's important to have a gas mask and a biosuit + bio hood if you don't know what you're doing.
- Pay attention to what other scientists are doing and don't get in their way. For example, if someone places a beaker into a reagent heater and runs away from it, he's probably anticipating a fireball or smoke of some degree and it's wise not to go look at, lest you get a face-full of it.
- Make liberal use of stabilizing agent. If you see a recipe that mentions stabilizing agent, always use it when mixing the recipe in question so it doesn't literally blow up in your face. It's a good practice to do this for recipes you're unfamiliar with. Be wary, however, that stabilizing agent doesn't work with everything - these cases should be mixed in the aforementioned test chamber.
- Test harmful or unknown chemicals on monkeys, NOT other people. This is why you have the ValuChimp. Monkeys are NPCs with damage counters just like that of a human's, so they'll provide an accurate representation of what would happen if you use that chemical mix on a human. This is doubly important if you're a round antagonist, as you will need to make sure your deathchems actually cause death instead of just provoking your target into toolboxing you.
- Test dangerous mixes in the Test Chamber or off-station. If you want test say, a beaker bomb, and it's supposed to make things explode, poison people, or otherwise harm things, try them in Test Chamber or some place away from the station, so other people aren't effected. Be sure to warn people ahead of time, so they can exit the area in time. Popular off-station locales include the Mining Outpost, the Space/Sea Diner, the Debris Field, the Trench, and the Mining Level.
Got all that? Good. Now we can get started with making napalm.
Discount Dan's Quik-Tips for Getting Acquainted with Chemistry
So, turns out making napalm isn't terribly complex at all. But there's more to chemistry than just making napalm--so much more! It's almost overwhelming. Where does an aspiring chemist start?
- Learn the most-commonly used compounds and healing chems.
- Basic compounds - Know each one by heart, for they are at the heart of many recipes. Luckily, there aren't many to learn.
- Medical chems - Learn how to make and use healing chems, and you'll live longer--and enjoy more of the round! You can even help others too. Plus, when you start to learn harmful recipes, you'll be able to heal yourself when you fuck up. Some particularly useful ones to learn are styptic powder & silver sulfadiazine, which heal up some of the most common injuries.
- Don't forget, there's a more detailed introduction/walkthrough to the wonderful world of chemistry below!
- Understand the patterns behind the recipes.
- The recipes for chems from real-life generally follow a comfortably simplified version of the actual process; for example, methamphetamine is based on the Nagai route, while sulfuric acid is just the elements that make up the molecule.
- The ones for entirely fictional chems tend be somewhat arbitrary, but for some, there's some simple logic linking them, e.g. glitter needs shiny stuff and a paper base for it, while flaptonium involves bird-related things. Even some of said arbitrary ones often use plasma for that "magical sci-fi chemical that can do anything".
- This holds particularly true for the secret chems:
- For ones that are based on real life, such as chlorine azide, study the general process and try to replicate it in SS13 with "equivalents"; for most, you usually don't have to go further than a Wikipedia page.
- For fictional chems, such as mutini, think about which chems can best replicate their effects. Some, like Crabby Party Secret Formula, are just jokes, where the hint is the punchline linking the ingredients together.
- If you get stuck, don't be afraid to ask for hints. In fact, there's even a Spacebux item called a "Chem Hint Scroll" that provides a clue for a random ingredient for a random chem.
- Look beyond the chem dispenser!
- The Botanists can mass-produce certain chems through the power of botany, significantly easing your workload. There are even a few chems that only obtained from certain plants. Don't be afraid to ask them to grow a few things.
- You can insert certain items into the Reagent Extractor, usually food and plant products, to get certain chems; many chems can only be obtained this way. Learn it and love it; neither are too hard to do. You'll use it a lot in your chemistry career; just look at all the places in the tables below that go "Extract from...".
- Discount Dan's products from red snack machines contain a true smorgasbord of chemicals. You might surprised (and maybe a little queasy) at what's in those noodle cups!
- There are many "designer drug" pills scattered in random places on the station/ship and elsewhere, often in pill bottles named in-game as "pill bottle (????)". Who knows what magical toxic treasures they contain!?
- Use Chem Dispenser Groups! Chemical groups make the chem dispenser automatically dispense certain chems, so you can spend less time on the aspect on chemistry that's usually pretty boring, staring at dispenser, and more time having fun actually testing/using the chems. They're also great for mass-producing certain compounds. Check out the following section on how to use them.
Chem Dispenser Groups: A Chemist's Best Friend
Chemical groups are a feature of the chem dispenser that allow the machine to dispense certain reagents automatically in a specific order when you click one of the group buttons. Groups streamline the production process quite significantly, especially for basic compounds. Even for simple recipes like potassium iodide, pressing just one button takes much less time than hunting down and pressing two of them, and you have a lot of control over amount created.
To make a chem group, hit the Record button and dispense reagents/make chemicals as normal. When you're done, press Stop, give your group a name, and click Add Group. Now, when you click on the group, the chemical dispenser will retrace your steps and replicate the actions it recorded. It will press the same buttons you pressed and dispense the same reagents you dispensed, in the same order as you did, with some caveats:
- Removals are not recorded, so if you had to get rid of some byproducts while recording, you'll still have to remove them when you hit the group.
- The dispenser tracks amounts dispensed. It can tell the difference between dispensing 10 units of water twice and dispensing 20 units of water once. It recognizes when you change the amount dispensed, so if you adjust the dispense amount midway to get more efficient ratios, the machine is smart enough to adjust too.
- The dispenser does not record/replicate the actual time between your button presses, which can be both a blessing and a curse. On the one hand, it's forgiving if you hunt and peck; if you're making a salt chemical group, and you hit buttons for dispensing water and chlorine but then spend a solid two minutes hunting for the button for sodium, the resulting group will dispense water, chlorine, and sodium in just seconds, without replicating your delay in looking for sodium. On the other hand, if you're making a chemical that has a delayed reaction, you'll need to plan around that.
You can insert your ID card into the dispenser to "save" it to your ID, any new groups made while your ID is inserted can only be used if your ID is in a dispenser. Good for keeping secret chemicals secret or just avoiding the hassle of adding new groups every time you have to use a new dispenser.
Getting Your Toes Wet
Need a bit more direction before heading off into the dangerous world of chemistry? This section describes a few specific commonly used and requested chems in ascending order of difficulty.
Acid (Not the Fun Kind)
Acids happen to simultaneously have some of the simplest recipes, the most obvious harmful effects, and somewhat high usage. You'll be particularly using your good friend Sulfuric Acid for a couple of recipes.
| Chemical Name | Recipe | Effects |
|---|---|---|
| Sulfuric Acid | (1) Sulfur + (1) Water + (1) Oxygen & Time -> (2) Sulfuric Acid | Deals decent damage scaling with quantity. doesn't melt items. Used in some other chems' recipes! |
| Fluorosulfuric Acid | (1) Sulfuric Acid (1) Fluorine + (1) Hydrogen + (1) Potassium @ 374 K -> (3) Fluorosulfuric Acid | Deals even more damage, again scaling with quantity. Always melts items upon application, and melts headgear if 9 or more units are splashed on a person. |
Since Sulfuric Acid is made entirely of chemicals in the chem dispenser, you only need to put a beaker in and hit each of those chemicals once. Simple! Once you have some sulfuric acid, you can add the fluorine, hydrogen, and potassium - again, all found in the dispenser - but then you will need to heat up the beaker. Put it in the Heating/Cooling unit and set the temperature really high - just setting it to the required temperature of 374K is slow and won't cut it compared to setting it to the maximum temperature and just removing it once it reacts. And once it does react - congratulations, you have a beaker of face-melting, day-ruining acid!
Getting Medbay to Love You
If you have a more pacifistic slant, you can make most of the medicines which medbay enjoys using. Two of the most commonly used medical chems are the following; they're fortunately pretty simple.
| Chemical Name | Recipe | Effects |
|---|---|---|
| Styptic Powder | (1) Aluminium + (1) Oxygen + (1) Hydrogen + (1) Sulfuric Acid -> (4) Styptic Powder | Slows down bleeding and heals BRUTE damage. Only apply topically, such as with patches - ingestion in pill or drink form poisons the patient! |
| Silver Sulfadiazine | (1) Ammonia + (1) Silver + (1) Sulfur + (1) Oxygen + (1) Chlorine -> (5) Silver Sulfadiazine | Heals BURN damage. Just like styptic powder, apply it topically or it will poison whoever ingests it! |
Similarly to Fluorosulfuric Acid above, to make styptic powder, you first need to brew up some sulfuric acid and add some other chemicals from the dispenser. Unlike the acid, it doesn't require any heating, making it quick and easy. Silver sulfadiazine is a bit more involved because it uses Ammonia, which has the following recipe:
| Chemical Name | Recipe | Effects |
|---|---|---|
| Ammonia | (3) Hydrogen + (1) Nitrogen -> (3) Ammonia | Doesn't actually do much on its own besides help the Botanists' plants - it does get used in a lot of recipes, though! |
This is an example of a chemical with a non-balanced recipe; pay careful attention to the ratios, or you may end up with leftover unwanted reagents! You'll also likely need to remove some of the resulting ammonia from the beaker to fit in silver sulfadiazine; you can't fit 30 each of ammonia, silver, sulfur, oxygen, and chlorine in a typical 100u beaker, much less a 50u one.
Those two chemicals alone can make medbay pretty happy when supplies run low. They can also be used by yourself if you don't trust doctors to patch you up, such as when you're an antagonist on the run from the law, or in the middle of a busy fight such as with Nuclear Operatives.
There are a couple of medical chems that medbay either doesn't start with or has a very low starting supply of, so making them will make the doctors there extra happy. See the following.
| Chemical Name | Recipe | Effects |
|---|---|---|
| Perfluorodecalin | (1) Hydrogen + (1) Fluorine + (1) Salicylic Acid @ 374 K -> (2) Perfluorodecalin | Heals OXY by a LOT and both raises and caps the breathloss amount - meaning you will only be able to talk in whispers while it's in you. |
| Cryoxadone | (2) Cryostylane + (1) Platinum + (2) Water & Time @ Below 323K-> (2) Cryoxadone | Does a bit of everything, as long as your body temperature is below 210K; heals BRUTE, BURN, TOX, and OXY by significant amounts. Warms you up if it heals you. |
Not all chemicals can be made with the chemicals available in the ChemMaster; sometimes you'll have to go through a few precursors first. Some common ones have been listed below.
| Chemical Name | Recipe | Effects |
|---|---|---|
| Oil | (1) Carbon + (1) Hydrogen + (1) Welding Fuel -> (3) Oil | A bit of a jack of all trades - if heated up enough it makes a fireball which both burns and produces ash, if applied to a floor it makes it slippery, if splashed on a borg it speeds it up, and it gets used in a lot of recipes! Wow! |
| Phenol | (1) Oil + (3) Welding Fuel + (0.1) Chlorine & Time-> (2) Acetone + (2) Phenol | Does nothing by itself, but is used to make a few other medical chems. |
| Salicylic Acid | (1) Sodium + (1) Phenol + (1) Carbon + (1) Oxygen @ 373.15 k -> (4) Salicylic Acid | Also known as painkiller or analgesic. Cools you down if you're too hot, sometimes heals some BRUTE, and negates some of the slowed movement associated with being injured. |
| Cryostylane | (1) Water + (1) Plasma + (1) Nitrogen -> (3) Cryostylane | When ingested or splashed on someone, it freezes them in an ice cube. It can also be used on floors to make them slippery, and if you add some oxygen to a beaker with cryostylane, both will be gradually consumed to cool down the beaker's contents. |
| Acetone | (1) Oil + (1) Welding Fuel + (1) Oxygen -> (3) Acetone | Fairly poisonous when ingested, and is used in several other recipes. |
| Unstable Mutagen | (1) Radium + (1) Plasma + (1) Chlorine -> (3) Unstable Mutagen | Mutates and does radiation damage by the truckload to whoever ingests it. Handle with care! |
To make the oil, you'll need to get some welding fuel - chemistry usually either has a fuel tank in a storage room nearby, which you can hit with a beaker to fill it, or chemistry will have some small, handheld red welding fuel tanks in a crate in the chemistry room. Whichever way you get it, make sure to watch how much of each reagent you have in your beakers - managing chemical amounts is a big part of chemistry!
Perfluorodecalin needs salicyclic acid, which needs sulfuric acid and phenol, which in turn needs oil. Balancing outputs is a little tricky due to sulfuric acid's unusual ratio, but it can be dealt with by using smart math or simply doling out ideal amounts with a mechanical dropper, and perfluorodecalin's excellent OXY healing makes it all worth the trouble.
Meanwhile, cryoxadone requires the much simpler precursor of cryostylane. Cryoxadone is not a difficult chemical to make, but it cools down every time it reacts, meaning you'll need to do a bit of temperature management if you want the reaction to be constant. You can't just throw the beaker into the reagent heater and whack it up to maximum, because at temperatures over 323K the chemicals won't react. However, you also can't just mix and forget, because eventually it'll cool enough that your water will freeze into ice. Thankfully the only thing that'll happen if you mismanage the temperature of this synthesis is a stall in the reaction, but not all chemicals are so forgiving!
A small usage note with cryoxadone - since you need to be quite cold for it to work, it's usually best to make pills of a mixture of cryoxadone and cryostylane. This pills, commonly referred to as "chill pills", freeze the patient upon ingestion, allowing the cryoxadone to do its stuff as well as provide a defensive layer.
Boom Bada Bing: A Few Explosives
Explosives are one of the best-known and most visible products of a chemistry lab. That being said, be careful with these if you are not an antagonist. Use the test chamber liberally when you are new, and use it even more when you're experienced and trying out new and unusual explosive mixes. Warnings considered, try out these two basic explosives.
| Chemical Name | Recipe | Effects |
|---|---|---|
| Flash Powder | (1) Aluminium + (1) Potassium + (1) Sulfur + (1) Chlorine (+ (1) Stabilizing Agent) -> (5) Flash Powder | MAKE SURE TO INCLUDE STABILISING AGENT BEFORE PUTTING ALL FOUR CHEMS IN ONE BEAKER. Flashbangs the nearby area upon activation, causing stuns and eye damage. |
| Magnesium Explosion | (1) Magnesium + (1) Copper + (1) Oxygen -> BOOM! | Unlike the other recipes, this one actually doesn't create a chem - only a reaction. This also means it's dangerous to mix - it can hurt you and the chemical dispenser you're making it in! |
The first one, Flash Powder, has a common trait of several explosives - if you have enough stabilizing agent in the beaker before you finish the mix, instead of immediately detonating, you will get a chemical which will detonate once heated enough. In flash powder's case, it explodes at 374 degrees Kelvin. If you are a crime-doing antagonist, you can leave a beaker lying around and put a welding tool underneath the beaker to create a sort of timebomb.
| Chemical Name | Recipe | Effects |
|---|---|---|
| Stabilizing Agent | (1) Iron + (1) Hydrogen + (1) Oxygen -> (2) Stabilizing Agent | Prevents some - but not all! - explosives from detonating upon synthesis. Make sure you have enough for how much explosive you're making! |
It has a slightly odd ratio, so be careful when mixing it all together!
The other explosive above cannot be stabilized, and can thus never be found in a heatable chemical form. It's a bit simpler to put together, but the challenge comes to finding some way to mix it far away from yourself - else you'll get the brunt of your own explosive! Get creative, and you will become a master of chemistry in no time.
All the Chemicals
Once you're ready to cannonball into the deep end - or are trying to find out the recipe of one specific chemical - your next stop is Chemicals. The sheer size of the page may be intimidating, but if you keep in mind the procedures above, you can tackle any of the regular chems - and potentially start on your journey to figuring out secret chems!
Chemical Warfare
Syndicate scientists are widely regarded as one of the most, if not THE most, dangerous threats in the game, and chemistry is the main reason for it. Burning the station to a crisp, spraying toxic goo everywhere, lethal injections... this is all just another day in the office for a regular chemist, so I'm sure you can imagine that a traitorous one is infinitely worse as it's a free ticket to do all those nasty things you couldn't do while you were an actual crew member!
Simply put, any and every method of applying chemicals to people is now a weapon. Spray bottles and emagged hyposprays are quick, quiet and painless (for you) chem application tools. Beakers and beaker assemblies make cheap-yet-fantastic gas bombs. The traitor-granted chemistry grenade pouch allows you to construct devastating chemical bombs. Flamethrowers are even more horrible; they convert chemicals into a spray that lets all included reagents penetrate skin (up to a little over five injected per shot), ignore biosuits/internals/gas masks and can hit multiple targets at once if aimed carefully, and the flamethrower can activate most heat-reactant chems in the spray by turning its igniter on.
Of course, you're far from invincible, so stocking up on beneficial chems to use for yourself is highly recommended - throwing poison and fire all over the place will have an angry mob out for your blood rather quickly, you know! Once you learn how to jump over this hurdle, the only limit to the destruction you can cause (other than BYOND, of course) is your imagination.
Supplementary Video
Gallery
| Department Guides | |
|---|---|
| Engineering | Making and Breaking · Construction · Gas · Power Grid · Thermoelectric Generator · Singularity Generator · Geothermal Generator · Catalytic Generator · Nuclear Generator · Mining · Materials and Crafting · Wiring · Hacking · MechComp · Mechanic components and you · Control Unit · Ruckingenur Kit · Reactor Statistics Computer · Cargo Crates |
| Medsci | Doctoring · Genetics · Robotics · Telescience · Plasma Research · Artifact Research · Chemistry · Chemicals · ChemiCompiler · Decomposition |
| Security | Security Officer · Contraband · Forensics · Space Law |
| Service | Foods and Drinks · Botany · Writing · Piano Song Dump · Instruments |
| The AI | Artificial Intelligence · AI Laws · Chain of Command · Guide to AI · Humans and Nonhumans · Killing the AI |
| Computers | Computers · TermOS · ThinkDOS · Packets |
