Medical Doctor
| MEDICAL DEPARTMENT | |
|---|---|
| Medical Doctor | |
 Medical Doctor |
Difficulty: Medium Requirements: None Access Level: Medbay, Morgue, Maintenance Additional Roleplay Access Level: None Supervisors: Medical Director, Captain Subordinates: Medical Trainee Responsibilities: Treat sick and injured crew members, bring dead ones back to life through cloning and other means Guides: Chemicals, Chemistry, Doctoring, Decomposition, Medical Objects, Virus |
Easily identified by their starting labcoat and cool red and white jumpsuit, Medical Doctors treat the crew's sick and injured and attempt to revive its dead. Some doctors roam the halls as paramedics, while some stay in Medbay and take on any incoming patients. All are expected to have a good grasp of the various types of damage and common ailments, the appropriate medicines and surgeries for treating them, and the procedures for cloning the dead, or at least the ability to scream at the Geneticists or Roboticists to handle said dead for them.
Being a doctor in Space Station 13 is easier than being one in real life, but perhaps just as stressful. SS13 is a dangerous place, and you can expect many patients dropping by, sometimes with lives at stake. Medbay is a frequent target of Antagonist activities, doctors are often put under unrealistic standards and expectations, and sometimes you just see the worst in people. In short, doctors are criminally understaffed and overworked due to many different factors. Nevertheless, being able to save people's lives--including yours--through good Doctoring is immensely rewarding, highly worthwhile to learn, and invaluable for everyone.
Your Tools
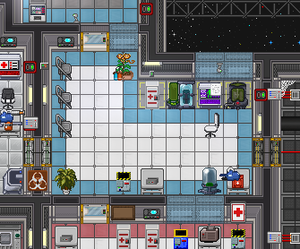
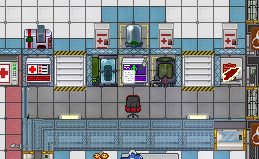
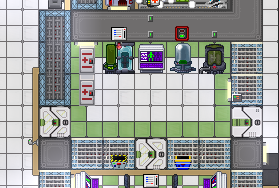
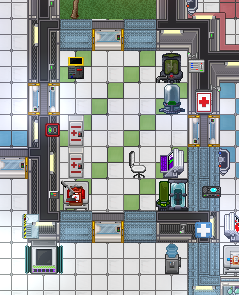
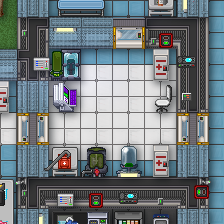
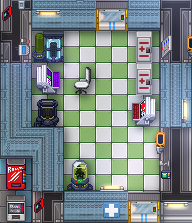
Your lockers, NanoMed medical dispensers, and Port-A-NanoMed contain vital equipment needed to save lives.
Medicine
All these treatments are administered by simply clicking on the patient with the medical item in your active hand.
- Medical patches administer a lot of medicine over a few minutes. They're appropriate for patients who have a fair bit of damage but aren't dying or in critical condition (less than 0 health). You'll most commonly use patches in the form of styptic powder patches for cuts and bruises and silver sulfadiazine patches for burns. They're a little uncommon, and once they're used up, you have to make more with a CheMaster.
- Auto-menders apply either styptic powder, silver sulfadiazine, or synthflesh topically, ramping up amount applied over time. You and the patient must be adjacent to each other. Suitable for treating both burns and bruises and good for both people with minor boo-boos and critically-injured people who need a lot of damage healed quickly. To refill it, click on it with a pill, reserve tank, or other container of medicine.
- Hyposprays automatically inject a set amount of chems into the patient, ideal for administering life-saving medicine in urgent situations, such as giving patients in heart failure epinephrine. However, by default, only certain chems can be inserted into the devices. You can have multiple chems in a hypospray and can refill it clicking on it with a pill, bottle, or other chem container.
- Pills are used for medicine that needs to be ingested in order to function, such as mutadone or salbutamol. The entire contents of the pill are put into the body upon ingestion, so they're good if the patient needs a moderate (roughly 20 units and over) dosage. If you're trying to swallow a pill yourself, you'll eat it immediately, but if you're making someone else swallow it, there's a few seconds of delay. For obvious reasons, you cannot reuse pills; instead, you must make more via a CheMaster.
- You can dissolve them in a beaker to withdraw medicine in a controlled manner, dispensing with a syringe or dropper.
- Similarly, syringes inject their contents into people 5 units a time. Because of the low capacity and administration method, it's best suited for medicines that heal internally and work best in small doses, such as calomel or charcoal. Like with pills, injection is instant if self-administered, but delayed if not. To refill a syringe, you must click on it in-hand to set it to draw, then click on a suitable container, such as a medicine bottle or reserve tank, with the syringe in your active hand. Don't forget to click on it in-hand again to set it to inject.
Other
- Medical belts store medical supplies and are a godsend when working outside of medbay, as they are essentially a medkit you can wear around your waist. Uniquely, unlike many other belts, they can store defibrillators. All medical doctors (and the Medical Director) spawn with a prepared version of these, containing the following:
- Two auto menders, one BRUTE containing 200u of styptic powder, and one BURN containing 200u of silver sulfadiazine.
- One empty hypospray.
- One fully upgraded health analyzer.
- One defibrillator.
- Your medical headset grants access to a radio frequency specific to the Medical department, which includes not only other Medical Doctors, but also Medical Trainees, Roboticists, Geneticists, and the Medical Director. Communication is king in a social game like SS13, and everything is much easier when Medical works as a team instead of a flock of headless chickens. One way to use the headset is to type
say :min the command line on the bottom of the screen, e.g.say :m Can you borg this body? They can't be cloned.
- The reagent scanner and health analyzers are important diagnostic tools. There are separate hand-held devices, and every medical PDA includes app versions of them. Regular health analyzers can be upgraded to show the chemical reagents currently inside a patient (but not the reagents inside other things) - check the medical vending machines/dispensers. The PDA's functions are separate (medical scan is on by default), whereas analyzers have an unified readout. You may have to enable the upgrade manually after installing it.
- With a stable oxygen supply and the ability to dispense certain medicine such as saline, sleepers are decent to prevent further degeneration of a patient's health status and allow anyone to view the occupant's health. Sleepers can also be set to hibernation mode, keeping the occupant asleep while injecting them with rejuvenators automatically. If you have too many severely hurt patients to handle at once, you may want to stick some of the more stable ones in sleepers while you deal with the emergencies first. Sleepers can also be used to treat addictions, which are surprisingly common and hard to get rid of by other means.
- Health Monitor Implants and implanters/implant guns are not exactly healing tools but will make your job immensely easier by notifying your PDA of when and where the implantee is in critical condition or has died.
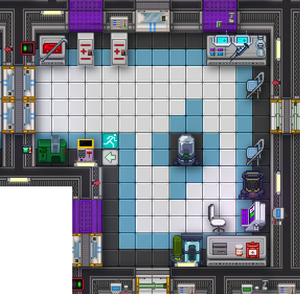
Medbay starts with a Head Surgeon. On any given round, there is a random chance that he will be a cardboard box or a medibot with a unique sprite. If he's a bot, let him treat minor injuries in the medbay lobby.
Basic First Aid
Your health goggles show you condition of everyone around you at a glance, and if you aren't wearing a pair as a doctor, you deserve to be fed to the roboticist. Equipping your pair of ProDocs with a health analyzer upgrade (check the medical vending machines) is also a good idea, because it makes performing a complete health scan of anybody within a 4 tile radius simply by examining them possible. The various handily-color-coded icons are explained below:
| Icon | Health Level | Meaning |
|---|---|---|
| 100% | Perfectly fine. They can be on their way out now. | |
| 80-99% | Hurt, but bearable. Needs some Saline and perhaps a patch or pill. | |
| 60-80% | Needs some assistance. A quick pill or patch will do. | |
| 40-60% | Hurting for some healing. Better look into it. | |
| 20-40% | Terribly injured. Needs some serious assistance. | |
| 0-20% | Close to dying. Tend to them urgently! | |
| < 0% | Dying! Get out the atropine/epinephrine and treat them quickly! | |
| N/A | Dead. Resurrect them with robotics, cloning, or chemistry. Check first though. | |
| N/A | Implanted with a Health Monitor implant. | |
| N/A | Implanted with a Cloner Monitor implant. | |
| N/A | Implanted with both a Health Monitor implant and a Cloner Monitor implant. | |
| N/A | Has one or more cyberorgans. |
Is the patient bleeding? Dress the wounds with bandages or suture, then check their blood level. If it's low, inject saline and use a blood bag on them.
Saline will help stabilize an injured person. Styptic powder works against brute damage and silver sulfadiazine against burns. Charcoal is effective in treating toxin damage. In case of suffocation, use a salbutamol pill. Scan your patient by using your PDA or health analyzer and administer the appropriate medicine.
People who have slipped into critical condition are at risk of falling into shock, cardiac failure or other terrible things and will die rapidly without treatment. CPR will help to keep them properly oxygenated and slow down the deterioration of their health. Just take off their mask and your own and target them with the Help intent. A patient who is thrown into cryo without being stabilized will take longer to heal and may die. In emergencies, an injection of epinephrine or atropine can help to rapidly resuscitate your patient, but don't overuse them!
Advanced Medicine
Between cryo, the various first aid kits and medibots, you have enough to treat most common ailments. For a more complex guide, check out Doctoring.
Using the Cryo Chambers
Setting Up the Cryo System
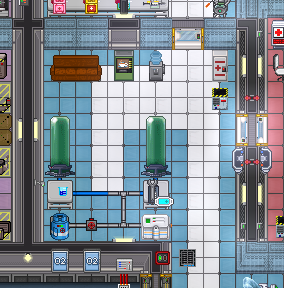
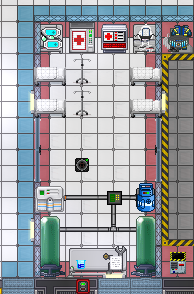
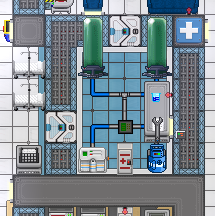
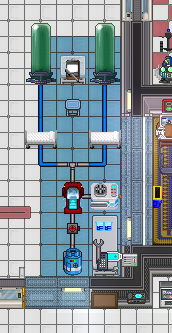
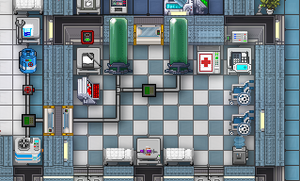
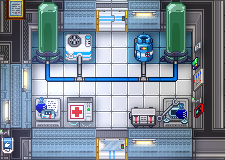
It's a good idea to invest a minute or two at the beginning of every round and start the cryogenic healing pod system, a machine that administers cryoxodone, a medicine with powerful healing properties at sub-zero temperatures. It's great at healing critically injured patients, but the cryo cells do require some setup to make full use of them. Make a habit of it.
- Pick up a wrench.
- Click on the O2 canister to connect it to the pipes.
- There should be two beakers of cryoxodone nearby. Pick up one at a time.
- Add one beaker to each cryo tube by clicking on it with the beaker.
- Set the freezer to the lowest possible temperature if necessary. To get the low temperatures needed for cryoxodone to heal, the cryo pods use cold gas to cool the patient down, which needs to be at 170 Kelvin or lower. It should be at its default value, 73.15 Kelvin. Flick the power switch and leave it on.
- (Optional) Add a health analyzer upgrade so you can view the reagents inside an occupant's bloodstream.
- (Optional) Add a defibrillator, so that the cryo cell can reverse cardiac failure and cure cardiac arrest. If you want to take the defib out to use it elsewhere or because you put it in accidentally, you can remove the defib simply by clicking on the cryo cell with a wrench, which is usually conveniently nearby.
Don't worry about the cryoxadone - it isn't used up unless there's someone inside the tube. If it does run out, you simply inject some in with a syringe or insert a fresh beaker of cryoxadone. However, leaving the chambers on causes a slow but constant gas leak. To avoid draining the O2 canister needlessly, leave the tubes off unless they're occupied.
Although the system comes with some fancy beakers of cryoxadone, there's nothing particularly special about the beakers themselves. Consider swapping them out with larger ones, to make room for additional medications!
It is also noteworthy that pure oxygen is not a requirement. Should you ever need to replace the gas supply, an air mix canister from emergency storage or the air hookups will work just as well.
Administering Cryomedicine
So, you have an emergency on your hand? Don't panic and follow this checklist:
- Stabilize the patient with CPR or stimulants.
- Check the cryo tube to see whether the gas temperature is still optimal.
- If the patient is wearing any type of exosuit (space suit, lab coat etc.) or headgear (mask, hat), remove them.
- Stuff the patient into an unoccupied tube and turn it on.
- If the cell is outfitted with a defibrillator, and the occupant is in cardiac failure or cardiac arrest, ZAP THEM!
- Monitor their recovery. Clicking on the cryo tube will pop up a window with the occupant's current health.
- Once they have fully recovered, the system will eject them automatically. Turn off the cryo tube at this time.
- Verify their status with your PDA or a health analyzer, especially if they had poison in their system or were suffering from heart failure.
To stress the point, it is important that you don't forget to strip your patient of exosuits and headgear. Their body temperature has to fall below a certain threshold, which is unlikely to happen if they still have said items on, or cryoxodone won't work. Plain and simple.
The Cloner
Sadly, you won't always be able to save the patient. This is where the cloning apparatus comes into the play, which was formally the geneticist's responsibility and is now open to all medical personnel.
To clone someone, simply go through the following steps:
- Click-drag the subject's sprite onto the scanner's. If that doesn't work, click on them while on Grab intent and then click on the scanner to load them in.
- Click on the cloning console with an data disk in your active hand. There's usually a box of blank disks near the scanner for your convenience. You can manufacture more at a medical fabricator.
- Click on the cloning console with an empty hand and click Scan under "Scanner Controls" to save their DNA to the disk.
- You can scan bodies without a brain or even a head. However, it has issues with people with Ossification, and, by default, it cannot scan bodies in the first stage of decay (or later). These are just some of the possible problems you might run into when scanning patients.
- This will also give them a cloner implant. If you put their disk into the cloning disk rack, the light by their disk will blink red if it loses radio contact with the implant, which usually means they've died but not always. This feature is not very useful if the person you scanned is already dead, but if you scan someone while they're still alive, this basically alerts you if/when they die.
- Cyborgs and helpful AIs can simply click on the cloning console, allowing a helpful silicon to control this process if you have a mind to let it to.
- Click Clone to start the cloning process.
- Click the scanner sprite to take them out of the scanner. You can also right-click the scanner and choose Eject, use the Eject verb from the Local tab, or enter Eject into the command bar.
You can also "pre-scan" people. If someone comes in to get scanned of their own accord, they can climb in and jump out of the DNA scanner themselves. If someone has the initiative to come in and get scanned on their own, it is polite to take their disk out, put it into the disk rack nearby, and keep eye on the rack. If a light on the rack has started to flash red, that usually means someone has died and needs to be cloned (but not always—this can also be caused by solar flares or people, accidentally or not, cutting out their cloner implant). If so, you need to take their disk out of the rack, put it into the cloning console, and hit that Clone button (you can skip scanning their body in this case.)
Once the cloning process starts, it normally takes about 2 minutes for it to complete. When a clone stumbles out, they are naked, and usually have some combination of toxin damage and brain damage. Charcoal and mannitol respectively will fix these problems. For increased efficiency, you can dissolve these chems directly into the cloning pod. For a very speedy cloning experience, additionally add potassium iodide and salicylic acid as well, or omnizine if you have access to it. Give them some new equipment from their old body if it's still around and send them on their way.
Cloning is not free. Not only does each clone require a certain amount of biomatter, but every time you clone someone, there's an increasing chance they'll come out with a cloner defect.
Cloner Error Messages
The cloning process won't always go so smoothly however. Sometimes, there's a number of errors and problems in the process. Luckily, there's (usually) a number of alternatives!
| Problem | Explanation | Solution |
|---|---|---|
| Error: Mental interface failure | Subject has logged out or gone braindead. Also possible if you try to scan someone who's already being cloned. | Not much. You can put their brain into a cyborg body/AI unit so they'll have something to do when they log back in, but you'll have a useless Cyborg/AI in the meantime. Strange reagents and brain transplants will result in another braindead player. |
| Cannot clone: Subject has set DNR. | Subject has set themself to Do Not Revive. | Move on. There's no way to revive them, not through Robotics or Chemistry, and they don't want to be. |
| Error: Failed to read genetic data from subject. Necrosis of tissue has been detected. | Subject's corpse is too decayed for cloning. | Send them to Robotics. Or find the upgrade that'll bypass it somewhere in Space. Or reanimate them with wacky, hacky medical procedures. |
| Error: Extreme genetic degradation present. | Subject is the husk of a Changeling snack. | Send them to Robotics. Or use a bit of brain swapping and other mad science to bring them back. |
| Insufficient biomatter to begin. | Biomatter reserves in cloning pod are less than 15% full. | Shove a dead body, some organs, viscerite, and/or some sort of meat into the Enzymatic Reclaimer. Click on the corpse with Grab intent then click on the reclaimer to shove it in. Click on it again to activate it. Certain reagents, such as blood and synthflesh, can be poured into the cloning pod (not the reclaimer) directly to replenish biomatter. |
| Clone generation process initi— oh fuck oh god oh no no NO NO NO THIS IS NOT GOOD" | Subject has the Puritan trait, causing them to get prematurely ejected, with 350 TOX, 200 BRUTE, a major cloning defect, and a high chance of missing a limb. | It's very hard, but they can be saved if you heal up the extreme TOX and BRUTE quickly enough. Afterwards, you can replace any missing limbs and insert them into a cryo healing pod, which fixes their "stunted genetics" caused by being cloned incompletely if they're below -43 C and above 90% HP.
If you can't save them in time (it takes a lot of skill, so don't sweat it), they always leave a brain when they gib (and they usually gib on death), so you can send the brain to Robotics for borging. Strange reagent and brain transplants won't work. |
| Clone Rejected: Deceased. | Subject has committed suicide while in the cloning pod. | Move on. They likely wanted to stay dead, for a number of reasons. |
| Unable to initiate cloning cycle | Subject has logged out or gone braindead | Not much. You can however still scan and try again later. |
| Error: No tissue mass present. Total ossification of subject detected. |
Subject is entirely skeleton, due to
|
|
| Error: Incompatible cellular structure | Subject is a kudzuperson. | You can send them to the Roboticists to be borged. Strange reagent should still work. |
Cloner Defects
| This page is incomplete. The following section is unfinished. You can help by contributing to the page and adding missing information. |
Whenever you clone someone, there's a increasing chance they'll come back wrong. The first time you clone someone, they may only get a minor defect, but they're guaranteed to get some major ones further down the line.
People with the Defect Prone trait have it extra bad; they get a cloning defect every time they get cloned, including the first one, and, depending on their luck (or rather lack of it), may acquire another. In addition, the first time they get cloned, they can potentially acquire one of the major clone defects, instead of only rolling for minor defects.
You can check if someone has a cloner defect by scanning them with a health analyzer. If the analyzer finds any, it will list them under a header named "Detected Cloning-Related Defects".
The following is a list of major and minor cloner defects.
| Defect | Minor or Major? | Effects |
|---|---|---|
| Minor Fortitude Decrease | Basically, you have a maximum health penalty. Your maximum health is decreased by a random number between 5 and 15. | |
| Vocal Chord Disfiguration | You've basically lost your voice and will show up as "Unknown" when speaking. Ingesting synthflesh will fix your vocal chords and restore your voice. | |
| Failed Organ Reconstruction (Minor) | You're missing a minor/nonessential organ, which can include (equal chance for each) your appendix, your stomach, your intestines, your left kidney, your right kidney, or your tail (if applicable). There's a major version of this defect with the exact same name and analyzer/record description text, but much more detrimental effects. | |
| Allergic Reaction | You pop out the cloner with 30 to 80 units of histamine in your system. | |
| Minor Stamina Decrease | There's a 33% chance your stamina regeneration has decreased by 1, a 33% chance it has decreased by 2, and a 33% chance it has actually stayed the same. For reference, most people have a stamina regeneration of 10. | |
| Minor Flesh Abnormality | You have a significant amount of BRUTE and BURN after hopping out of the clonepod. Their combined total is a random whole number between 30 and 50, i.e. not enough to put you in critical condition, but a big chunk of health nonetheless. This counts as a source of damage to the chest, so you may also have organ damage. | |
| Minor Organ Aberration | Up to three random organs each have 10 to 20 organ damage. For example, you could get 12 liver damage and 12 appendix damage. The list of affected organs specifically excludes the brain, but it does include the heart and both eyes. Eyes, lung, and kidneys are counted separately, so it's possible that one eye/kidney/lung is damaged but not the other. Due to the way it selects organs, this defect can basically damage organs twice, resulting in something like 12 right eye damage and 24 (2 * 12) pancreas damage. | |
| Failed Limb Reconstruction | You're missing an arm or leg (equal chance for each). It hasn't been severed; it's simply gone. | |
| Motor Control Impairment | You essentially become clumsy. You either gain the Two Left Feet trait, the Clutz trait, or the Dyspraxia mutation, with a 33% chance for each. | |
| Chemical Weakness | The threshold where you experience overdose (OD) effects is halved, so you OD at lower amounts. For example, if a chemical normally causes overdose effects at 20 units, you OD when you have 10 units in your system. | |
| Poor Muscular Regulation | If you run out of stamina while sprinting, you clumsily fall to the floor like a doofus, out of breath and wheezing. | |
| Unexpected Genetic Development | You mutate into a random "mutantrace". This is restricted to "safe", relatively balanced mutantraces like monkey, cow, pug, roachperson, skeleton, human (which does may not sound bad, but it can be a shock if your character was originally a lizardperson for example), and the strange, water-hating "bingus" race. | |
| Major Concussive Complication | You suffer 60 to 90 brain damage, causing significant impairment. Having Frail Constitution trait actually halves this, so that you don't immediately die of brain damage the moment you pop out the clone pod. | |
| Facial Disfiguration | Your face is deformed beyond recognition. As a result, you appear as "Unknown" on mouseover/Examine instead of your actual name, leading to things like "Unknown (as Erik Leroux)". You can mend the damage by pouring synthflesh on yourself (or otherwise administering it via a TOUCH reaction). | |
| Major Fortitude Decrease | Your maximum health is decreased by a random number between 20 and 30. | |
| Failed Organ Reconstruction (Major) | Your liver, your left eye, your right eye, your right lung, or your left lung is missing (equal chance for each). Note that there's a minor version of this defect that has the exact same name and analyzer/record description text but affects different organs, so double-check which organs are actually missing before you get a replacement. | |
| Rapid-Onset Puritanism | You gain the Puritan trait, which makes cloning much more difficult because every time you get cloned, you come extremely deformed and nearly dead. | |
| Major Flesh Abnormality | You have a huge amount of BRUTE and BURN. Their combined total is a random whole number between 100 and 140, so you basically come out the clonepod in critical condition and in dire need of healing. Due to the way the game causes this damage, you may also have organ damage. | |
| Major Organ Aberration | This is almost exactly the same as Minor Organ Aberration, except up to five organs are damaged, and they each have 20 to 30 damage. As an example, you could end up with 24 right eye damage, 24 left lung damage, and 24 intestines damage. This can target the same organ multiple times, potentially inflicting enough damage to cause organ failure. For example, you could pop out with 27 heart damage and 81 (27 * 3) left lung damage, past the threshold where you may randomly develop respiratory failure. | |
| Limb Discombobulation | Basically, your arms and legs switch places. Your legs are now where your arms should be, and your arms are where your legs should be, rendering your arms useless until someone severs your arms and legs and reattaches them in their correct positions. |
Upgrades & Repair
The cloner comes with a "Advanced Genetic Analysis" option, toggled at its computer. Alongside some boosts to material regeneration and cooldowns at the geneticists' consoles when cloner's cloning someone, it makes the cloner copy any active genetic effects they had when they were scanned. It's rather nice in general, but it's particularly useful for people playing non-human races, e.g. lizardpeople, cowpeople, etc. Normally, they come out as humans after getting cloned, rather than the species they chose. Advanced Genetic Analysis rectifies this, so fishpeople pop out as fishpeople, roachpeople as roachpeople, so on and so forth. It slows down cloning somewhat though, so it's up to you if the effects are worth the longer cloning cycles.
In addition, the cloner can augmented with several modules. Some speed up the process significantly, some change the amount of biomatter used in each cycle, some even allow you to give clones a certain mutation. Check them out in your own free time.
If cloning is damaged or destroyed it can be possible to make a new one elsewhere, but unless some individual components were scanned first it might be tough.
Medical Doctor XP
At the end of the round, the game rewards you with XP. You gain XP each time you complete certain tasks, specifically:
| Action | XP Earned |
|---|---|
| Defibrillating someone. | 5 |
| Scanning someone in the cloner. | 10 |
| Cloning someone through the cloner. | 15 |
| Removing a headspider from someone through surgery. Good luck! | 15 |
| Using a hypospray on someone with less than 90 health. Hypo must not be emagged. | 1 |
| Applying patch a on someone with less than 90 health. | 1 |
| Inserting a heart into someone who is not dead and ends at below 0 health. | 15 |
| Inserting a heart into someone who is not dead and ends up above 0 health. | 30 |
| Implanting someone who isn't dead with a health implant. | 1 |
| Offering blood to Dr. Acula, the MDir's pet bat, by click-dragging the bat onto you while aiming for an arm. | 1 |
| Completing the "Do not commit a violent act all round..." objective. | 50 |
| Completing the "Use at least 10 medical patches on injured people." objective. | 50 |
| Completing the "Ensure that the cryo tanks are on and below 225K..." objective. | 50 |
| Completing the "Make sure you are completely unhurt..." objective. | 50 |
This XP goes to your job level, and when you reach certain job levels, you unlock a few fun little items. Or, would, if they're implemented yet. Medical Doctor XP and Job Levels otherwise have no effect on gameplay.
Crew Objectives
As a loyal crew member, you can sometimes be assigned some strictly optional objectives to keep yourself busy while you wait for something to happen. If you complete your objectives by the end of the round, you'll get some bonus Spacebux, extra Medical Doctor XP, and possibly earn some Medals too. As a medical doctor, you can expect to see the following:
Do not commit a violent act all round. Punching someone, or shooting them with a laser will cause you to fail. Disarms are still allowed.
Never use the Harm intent, basically. Like it says, disarm actions are still kosher.
Completing this objective for the first time gives you the Primum non nocere medal. That's Latin for "first, do no harm", which is a technically a different thing from this objective, but anyways, this medal unlocks a unique pattern for medical scrubs.
Use at least 10 medical patches on injured people.
Just do what you normally do, and this objective basically completes itself. The "injured" part is key; if the person you're using patches on has at 90% health or less, it doesn't count for this objective. Applying patches on yourself also doesn't count, so you can't just punch yourself a bunch and apply a few medical patches. Note also that it specifies medical patches; the patches must contain only chems that can go in a hypospray, so no nicotine or atropine patches. On a brighter note, mini-patches do count, so if you really want to optimize, apply a couple of mini-patches rather than one single big patch.
Completing this objective for the first time gives you the Patchwork medal, which unlocks a "Cool Medical Labcoat" reskin for the doctor's labcoat (which the medal reward UI calls a "medical labcoat"), giving it a unique color gradient.
Ensure that the cryo tanks are on and below 225K at the end of the round.
If you get this objective, ignore it until near the end of the round. When the shuttle is about to dock, turn the tanks on. If left on for the whole round, the connected gas canister will be drained fairly rapidly, so don't do it please.
Completing this objective for the first time gives you the It's frickin' freezing in here, Mr. Bigglesworth medal. Unlike the above two objectives though, it doesn't have a reskin or other reward tied to it.
Make sure you are completely unhurt at the end of the round.
More specifically, have no BRUTE, BURN, TOX, or OXY when it happens--notice organ damage, brain damage, bleeding, and other damage types aren't counted. Even a tiny sliver will disqualify you, so don't be stingy. You also have to still be alive, so if you get gibbed at full health, it doesn't count.
Completing this objective for the first time gives you the Smooth Operator medal. There isn't a special reward or unlock associated with it, sadly.
Doctor Death: Antagonist Medical Doctor
Body disposal is easy as an antagonist doc. Generally, no one will stop to question a doctor dragging an injured crew member or corpse, so long as it's towards medbay. You have equipment to restrain and anesthetize any downed victims, and the manufacturer in robotics next door can be hacked to make flashes.
Once you've killed someone, you might want to deal with their disk, so that they're less likely to get revived. For example, you could eject their disk when no one's looking and hide it somewhere. You could also take a pen or hand labeler and secretly change the name on their disk. If you really want them gone, overwrite it with someone else's data or wipe it with a multitool.
Also keep in mind that sometimes it is hard to tell the difference between a doctor who harms their patients through idiocy and one who does so through malevolence...
Syndicate Shenanigans: Traitor Medical Doctor
As a Traitor Medical Doctor, you have seven job-specific items available for purchase: the mindhack cloning module, Mindhack Cloning Module - Deluxe Package, the poison bottle, the poison bottle bundle, stimulants, and the syringe gun.
Speaking on a more general basis, a traitor medic has the right tools for quiet assassinations and all-out rampages. Emagging your hyposprays will let you load them with whatever you want, instantly injecting your targets with any variety of harmful chemicals. Your medical vending machine starts out with a few nice ones (such as pancuronium), and more potent drugs can be made if you're able to slip into chemistry. Failing that, poison bottles are well-priced and a good option. Emagged sleepers will inject the occupant with poisons, which is best combined with hibernation mode. For the more overt killer, you can use the syringe gun, which draws a harmful chem of your choice from an internal reservoir and fires them at people.
Learn the Basics of Medical Doctor in Just...
...20 Minutes
...5 Minutes
Supplementary Videos
| Jobs on Space Station 13 | ||
|---|---|---|
| Command & Security |
||
| Medical | ||
| Research | ||
| Engineering | ||
| Civilian |
| |
| Silicon | ||
| Jobs of the Day | ||
| Antagonist Roles | With own mode | |
| Others | ||
| Special Roles | ||
