Engineer: Difference between revisions
Studenterhue (talk | contribs) m Text replacement - "Technical Assistant" to "Technical Trainee" |
Studenterhue (talk | contribs) →Engineering a Disaster: Antagonist Engineer: Rewrite a sentence referring to the Reset module, removed when PR #7555 was merged. |
||
| Line 216: | Line 216: | ||
==Engineering a Disaster: Antagonist Engineer == | ==Engineering a Disaster: Antagonist Engineer == | ||
[[Antagonist]] Engineers often choose to wreak a little havoc using the [[AI]] as an assistant. With easy access to tools and gloves, you can easily break in to the [[AI Upload]] and give it a law that'll send it on a bloody rampage. You'll have to careful around the stun turrets (which you can't turn off), but they're easy to dodge if you're fast enough. (If you're not, throw a [[Engineering Objects#Metal Foam Grenade|foam grenade]] into the upload to block them off.) To seal the deal, | [[Antagonist]] Engineers often choose to wreak a little havoc using the [[AI]] as an assistant. With easy access to tools and gloves, you can easily break in to the [[AI Upload]] and give it a law that'll send it on a bloody rampage. You'll have to careful around the stun turrets (which you can't turn off), but they're easy to dodge if you're fast enough. (If you're not, throw a [[Engineering Objects#Metal Foam Grenade|foam grenade]] into the upload to block them off.) To seal the deal, go to the [[Computer Core]], [[Construction#Console|deconstruct]] the [[Computers#Robotics Control Computer|Robotics Control Computer]], and steal the spare Robotics Control Computer board, so the crew can't killswitch the AI. | ||
The power transmission laser can also reach insane levels of power if enough watts are being sent out, to the point that contact causes immediate, absolute disintegration. The flow of the laser is fixed, so you can only take advantage of it in particular places, but it makes for excellent corpse removal and a nice way of executing any stunned or unconscious victims. | The power transmission laser can also reach insane levels of power if enough watts are being sent out, to the point that contact causes immediate, absolute disintegration. The flow of the laser is fixed, so you can only take advantage of it in particular places, but it makes for excellent corpse removal and a nice way of executing any stunned or unconscious victims. | ||
Revision as of 07:24, 4 January 2025
| ENGINEERING DEPARTMENT | |
|---|---|
| Engineer | |
 Engineer |
Difficulty: Easy to Medium Requirements: None Access Level: Engineering, Maintenance, Mechanics Workshop, Tech Storage Additional Roleplay Access Level: None Supervisors: Chief Engineer, Captain Subordinates: Technical Trainee Responsibilities: Conduct structural and electrical repairs, configure the solars (space-based maps), setup and maintain the main power generator, backup the crew's electronic devices, and make copies of them if lost, damaged, or otherwise in need of extras. Guides: Power Grid, Thermoelectric Generator, Singularity Generator, Geothermal Generator, Catalytic Generator, Nuclear Generator, Construction, Guide to Wiring, Gas, Engineering Objects, MechComp, Ruckingenur Kit |
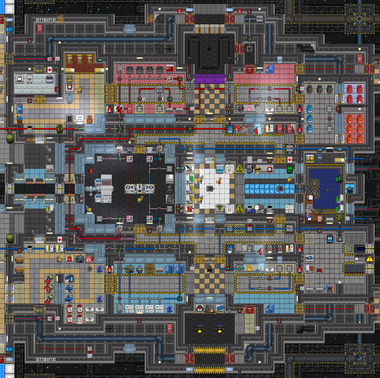
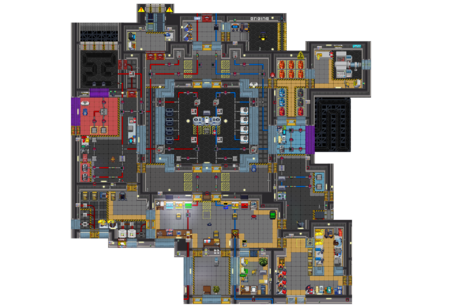
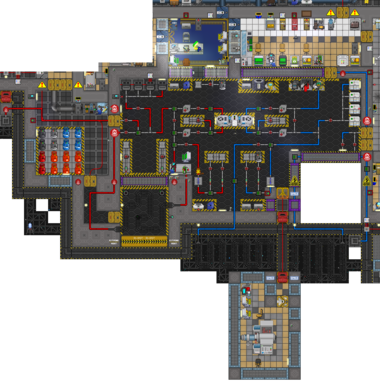
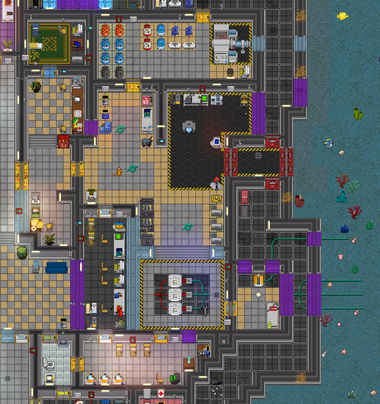
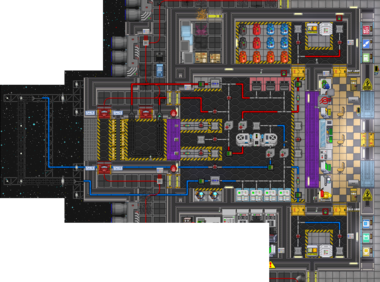
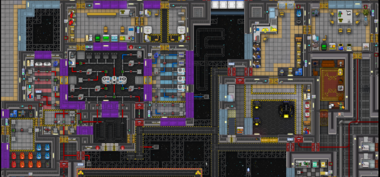
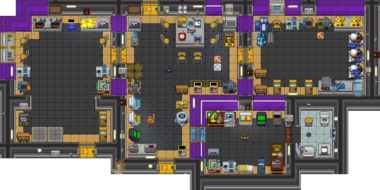
Trust yourself, you're an Engineer. You start in Engineering with an epic array of gear, tools, and materials at your disposal and the equally epic responsibilities of starting the engine in Engineering and repairing and renovating the station. Both tasks may cause side effects such as horrific burns, rapid suffocation, and death.
Power to the People
- Main article: Power Grid
Generation
There are a plethora of ways to generate power, each with their own intricacies and subtleties, but as an Engineer, you're primarily concerned with the engine in Engineering. Depending on the map, that engine is either the Thermo-Electric Generator or the Geothermal Capture System.
The Thermo Electric-Generator
The main means of generating power on Cogmap2, Cogmap1, Kondaru, and Atlas. This page will give you a primer on how to get the engine running. Short version:
- Get any gas flowing in the two gas loops that meet in the Thermo-Electric engine in the middle of Engineering.
- You want the top loop to be real hot and the bottom loop to be real cold. The temperature difference is what generates power. People usually focus on heating the hot loop.
- The hot loop can be heated by connecting hot gas to the loop in the first place, by burning fuel in the furnaces, or by getting a fire running in the combustion chamber.
- The cold loop mostly cools itself by a coil exposed to space, or can be cooled with freezer units.
- Be careful with pressure. Get it too high, and the pipes will burst.
- Minimum pressure can be set on circulators with a multitool to the left and right of the engine.
- Don't forget to open valves as needed to get the gas going where it needs to go.
- Don't forget to set the SMES units.
It's probably going to be a little intimidating at first, but it's not so bad once you get used to it. Learning it is a lot easier and overall better if you have a fellow Engineer helping you every step of the way or a Mentor guiding you through. This is true with a lot of things, but it's especially so in this case.
The Singularity
On Donut 3 and Donut 2, instead working in a blistering-hot hell-inferno like those other stations and ships, you work six feet from the edge of a bottomless abyss, using the power of the void to keep the lights on. This page will give you the rundown on how to harness the all-consuming empty and setup the singularity. Short version of that:
- Secure down the emitters, field generators, collection arrays, array controllers, and singularity generator in their proper positions, using wrenches and welders.
- Turn on the emitters, then the field generators. The emitters will shoot beams at and transfer power to the field generators, and the field generators will create a containment field that keeps the singularity in place. Remember that the Engine Control Computer can turn the emitters and field generators on for you. (By the way, the shield generator by it has nothing to do with the singulo engine.)
- If the field generators are the proper distance apart and creating containment beams, the singularity generator should automatically collapse into a singularity. The singularity has an immense gravitational pull and occasionally releases various types of radiation, so take some proper precautions.
- Don't stare into the singularity without mesons if you like your eyes.
- Don't stand around the singularity if you don't have magboots, unless you like falling on your face and being dragged towards its center.
- Don't work around the singularity if you aren't wearing radiation gear, because the singularity releases bursts of radiation that, while infrequent, do cause a fair bit of damage.
- Don't forget to put plasma tanks from the tank dispensers into the collection arrays and to turn on the collection arrays and array controllers, which are what actually generate power.
- Don't forget to set the SMES units.
- Feeding people, monkeys, and items into the singularity permanently boosts its power output, with people and monkeys providing much more than items.
Rather cookie-cutter, but at least it means you'll have the freetime to complete repairs, do renovations, and other things. If you flub up, you might release a loose singularity, but as long as you double-check everything's properly secured before starting anything and activate emitters before field generators, you'll be fine.
The Geothermal Capture System
If you're working on the Oshan Laboratory, you better check underneath the sea(floor), because that's where you will find the energy! Anyways, dumb Sealab 2021 references aside, on Oshan Laboratory, you'll be using the geothermal energy on Abzu's seafloor to generate electricity. This page will tell all about how to set it up and improve it. Here's the short version of it:
- The system generates power via geothermal vent units placed over the centers of hotspots, where it's hottest and thus produces the most power.
- You find these hotspots and locate their centers, you need place down (and pick up) dowsing rods and look at their readings. Redder/pinker colors indicate higher temperatures; lower numbers indicate closer distance to the center of a hotspot. As a hotspot drifts, it will drag any placed dowsing rods in its range along with it.
- Dowsing rods are also affected by Doppler shift, so there some places that say they're closer to the center than they actually are and some that say they're farther.
- Once you've located the center of a hotspot, lock it in place with a stomper unit or your stomper boots. Then, dig a hole into it with a power shovel, build a vent capture unit on it, and wire it back to the station. There are boxes of wire in the crates
- To generate more power, you can move hotspots closer together so they generate more heat, dig out the rock in the hotspot's corresponding location in the trench to release the energy trapped underneath, or just build more holes and vent capture units around a vent capture spot.
- Don't forget to set the SMES units.
All the tools you need will either be in Engineering Storage or the general Engineering foyer section near the double-door-sized airlock leading into the seafloor, kept either in the open or inside crates.
The Nuclear Engine
On the NSS Clarion, you must harness the power of the atom through the Nuclear Engine. While operating a nuclear reactor in real life requires years and years of training and is often tedious and dull, here, nuclear power is a fun puzzle with spicy rocks, and anybody can learn how to run a reactor if they're willing to learn, no real life knowledge of nuclear physics necessary.
- Hopefully, it should be obvious why you should wear radiation gear when working with the reactor. Not only do you need to handle nuclear materials when crafting fuel rods, but the reactor itself also produces deadly radiation if there's nothing within it to prevent neutrons from escaping or something around it to stop any that do escape.
Solar Panel Arrays
The more passive, easy-going companion to the engine, and the backup power supply if the engine breaks. Every map except Oshan Laboratory (for obvious reasons) has these. They're pretty much maintenance-free once the SMES units are set up or the solar panels are hotwired (i.e. the wires go from the solar panels straight to the station, rather than going through a SMES). However, if the wiring for the solars breaks for any reason, repairing it falls under your responsibility. Be sure to head over to the relevant page section to learn about properly setting them up.
Power Distribution
Once the engine is up and running, and the solar arrays are receiving starlight, the power generated by the engine then goes through wires connected to SMES units, which distribute a configured amount of power throughout the station to APCs, which control the machines, lights, and other immobile electrical devices in their designated rooms.
SMES Cells
Superconducting magnet arrays that use the principle of electromagnetic induction to store energy. Charging these to full isn't really a top priority, but the rest of the station receives power from these SMES units, so properly configuring them is important. The precise numbers are different for each station and engine setup, but a good configuration setting is little under half of the engine's output as SMES input (to counter fluctuations), and half of that as SMES output (to charge the SMES).
With some fairly basic wiring knowledge, it is possible to bypass the SMES units altogether, a practice known as hotwiring. Hotwiring generally means the station is receiving more power at higher safety risk, which scales with the amount of power being generated. Hotwiring the solars arrays is almost always safe, with hotwiring the singularity or a basic low-power thermo-electric generator setup being slightly more dangerous. Hotwiring an advanced TEG setup that generates tens or hundreds of MW and more, however, is very likely to overload the station power network, potentially causing APCs to spontaneously shock people and electric shocks to seriously hurt, so you generally shouldn't do that unless you're an antagonist.
APCs
Area power controllers, white panels with lots of little lights that control electricity coming into an area. If you've set up the engine correctly, then these should be receiving power. You'll know because they'll say "Good" in green-colored font. If they say "Low" or "None", you might want to check up on the SMES units or make sure the wiring leading to the APC is intact.
You don't necessarily need to touch them when setting up the engine, but you might need to mess with their settings after an ion storm has hit the station or after a power sink has been deployed and you need to get stuff back online. See this page for info on their settings.
Power Transmission Laser
A treat for good Engineers on every map besides Atlas. Once you have the engine running, consider routing some of your extra watts into the power transmission laser. Not only does it output power as a frickin' laser beam, but it also produces fat stacks of cash! The money the PTL earns is stored in an internal "account", giving you and your colleagues the freedom to divvy it up amongst yourselves however you want (or, alternatively, bicker over it). It takes some micromanagement, but if you can set it up right, you can make millions of credits every minute and if you spread that money around, such as by donating a share of the earnings to the Quartermaster's Cargo budget, you'll surely earn the favor of the entire crew. Just keep a close eye on the input depriving any departments of power in the process.
Power Checker 0.14
Luckily, you don't have to shut yourself in Engineering and watch numbers go up and down all round. All Engineer PDAs come with the program Power Checker 0.14, an app that gives you important information about the engine, so you can keep an eye on it while you're out there conducting repairs and building things. The specific information tracked depends on the type of engine:
- Thermoelectric Generator: Same statistics as clicking on the TEG unit itself would, i.e. engine output and temperature and pressure at cold loop inlet, cold loop outlet, hot loop inlet, and hot loop outlet.
- Singularity Generator: Power output of each radiation collector and the pressures of the plasma tanks within each one.
- Nuclear Generator: The turbine's power output, RPM, stator load, and internal temperature, as well as the radiation level and temperature of the reactor.
- Geothermal Generator: Output of vent units.
It also shows you various stats about the PTL, including vital statistics such as power input, power stored in PTL, output, etc., if your map has one.
Repairing the Station
- Main article: Construction#Walls, Doors, and Floors
The Engineering department's other real job is repairing hull breaches and damage. To rep, you'll require a stack of metal. Though it's technically not required, you'll also want a space suit and an air tank-breath mask combo. All these can be found in Engineering Storage and, if your station/ship has one, Engineering Pod Bay.
Thanks to starting with the Engineering Training trait, constructing/deconstructing certain structures and objects, such as windows, take only half the time. Shame it doesn't work with Carpenter though.
Flooring 
If there isn't a stack of floor tiles, click on a stack of metal while it's in your hand to bring up the construction window and select Floor Tiles. The precise number of tiles you'll need to make depends on the situation. Don't fret about making too little, as you can easily make more, or too many, as the extra tiles can potentially be reprocessed back into sheets, and sheets themselves are often plentiful and easy to make.
To repair the breach, simply click on the space tile or lattice with the floor tiles in your active hand to create some flooring. You can also press your action key while standing over a spot without a tile to place one down. Once totally sealed, garnish with space HVAC units so people can walk through the area without slowing to a crawl.
If you want the area to look like it didn't totally just explode, you'll want to learn how to replace broken floor tiles. To do this, just use a crowbar on the tiles that look burned, and then replace them with new floor tiles. You can also hold the crowbar in your off hand and click the damaged tiles with the new tiles themselves to instantly replace it. It's not really an important skill to have, but it does make the station look less like a death trap.
Walls 
You may also need to make walls to fully seal a breach. To do this, you'll require a stack of metal (and optionally rods).
First, you need to build a girder, either by clicking on the stack to open the metal's construction window and selecting Wall Girders or by simply clicking on a tile with sheets in your active hand. Once the girder's built, use metal on it to form a wall. You can also use reinforced metal for the plating, which you can make by combining regular metal sheets and rods. If you want to make a false wall, use a crowbar on the girder first to dislodge it, then apply the plating.
Windows 
While you're at it, you should also repair any broken windows. It's easy. Similar to metal sheets, clicking on a stack of glass sheets in-hand opens up a construction window with the choices of large and thin windows. Most of the time, you'll be choosing large windows, simply because large windows are more common, but there are places that use thin windows.
Windows with grilles are even easier. If the grille's still there (it doesn't matter how broken it is), you can just click on the grille while holding glass sheets of any kind to put a full-sized window over it. If the grille's gone, but there's still some bit of grille leftover, just click on a stack of rods while standing over the broken grille to repair it, then do the previously-mentioned steps. If the grille's completely gone, construct a new grille by clicking on a stack of at least two rods, then construct the windows are previously mentioned.
Repressurizing 
Now, once you've fully sealed the breach, you might want to repressurize the room so that people aren't suffocating and gasping for air as they walk through the place. If the room has an Emergency Air Hookup for it, you can just connect the air canisters to the relevant ports and turn the relevant valves.
If not, you'll have to manually refill the air by bringing in some air canisters. Don't just open it and leave it out in one spot; all the air will accumulate in that one spot rather than spreading out. Instead, set the canister to a fairly high (600 kPA or more) and move the canister every few seconds so the air is (hopefully) evenly distributed through the room. Scan the room tiles with an atmospheric analyzer every so often, and make sure there's at least 85 kPa of air mix (or at least 17 kPA of oxygen) on each tile.
Lighting 

While you're at it, you should also fix the lighting. It's pretty straightforward. Just grab a miniaturized lamp manufacturer from an Engineer locker and some metal sheets from Engineering Storage or similar. Plain white light tubes and bulbs are fine, but if you want to, you can opt for colored lights and turn the room into some sort of swanky Christmas-themed nightclub/spooky den.
If you find a broken light bulb/tube, click on the miniaturized lamp manufacturer while it's in your active hand, click on the color you want, and click on either Fitting Production: Bulbs or Fitting Production: Tubes depending on what you're trying to replace. Then, click on the broken light to replace it. To add new lights, just click on a wall, window, or square of flooring with the lamp manufacturer, and it'll try to put one down according to the settings. The miniaturized lamp manufacturer uses metal sheets to do both these things, so you might need to refill it sometimes. To refill it, just click on the miniaturized lamp manufacturer while your active hand is holding metal sheets.
If there are no miniaturized lamp manufacturers (whether because someone stole them all, other people are using the other ones, etc.), you might have to go old school and grab a few replacement light tube/bulb boxes from Engineering Storage (or make them using the fabricator in Tool Storage) and go replace lights the old-fashioned way. Worth noting it is possible get another one through the Construction Equipment Crate, which is something the Quartermasters can order using money from the Cargo budget, at a somewhat steep price.
Wiring and Piping 

If things get really bad, you might also need to replace the wiring. As always, Engineering Storage has plenty of wires, usually in either cable coil boxes or electrical toolboxes. Be sure to check out the Guide to Wiring for a primer on the fundamental principles of wiring. Don't fret too much about replicating the original layout. Just make sure there's a complete link with the rest of the power network.
If you have the time, you might also want to replace any broken disposal piping. To start your pipelaying adventure, you'll need to obtain a welding tool and drag the disposal pipe dispenser cart over to where you want to work. Use the welding tool to melt away any broken disposal piping sections. Once you've placed the particular pipe you need in the proper position, use the welder to secure it on the floor. Don't worry about getting the layout right. Just make sure there's a complete link. If you make a mistake, simply unweld the pipe from the floor.
Now What?
The engine is up and running. There are no hull breaches or things that need repairing. All the APCs are fully-charged, and nobody's running out of power. There's nothing to do. What now?
To start with, you could start learning how to hack doors. It takes a good deal of effort, but it's well worth it. An engineer who knows how to manipulate the door wires effectively has access to the entire station/ship and can go wherever they please. You could use this power to break into places, but that'll get you into trouble with Security, and besides, there are much better uses. Is there an Adventure Zone expedition going on? Sounds like a job for an Engineer; some zones require knowledge of door-hacking to proceed. Has the AI gone rogue? Hack into the AI Upload and fix its laws. Have the Nukies holed up somewhere with the bomb? Break through their defenses by hacking open the doors to the bomb site so the rest of the crew funnel in and defeat them.
Another bad idea for Engineers is making and wearing Stungloves. To make a pair of Stungloves, take a pair of insulated gloves and use wiring on them. Then use a power cell on the the Insulated Gloves to charge them; you can have up to four charges. If you wear them and do a special attack while unarmed, you'll throw sparks that drain people's stamina and make it harder for them to move. This sounds great (and it is), but stun gloves have an extremely obvious sprite and sometimes Security Officers will deem them as a weapon and arrest you to get them. If you do make some Stungloves, keep them in your backpack until things start blowing up. After there's been a few murder reports, even the most strict Security Officers will be too busy to care about your gloves.
Crew Objectives
As a loyal crew member, you can sometimes be assigned some strictly optional objectives to keep yourself busy while you wait for something to happen. If you complete your objectives by the end of the round, you'll get some bonus Spacebux and might even earn some Medals too. As an Engineer, you can expect to see the following:
Have at least ten items scanned and researched in the ruckingenur at the end of the round.
Just hit some random items with your PDA, and it should automatically add the scans to the ruckingenur kit; if not, get a device analyzer from the Mechanics Workshop and do it manually. This objective doesn't care about what kind of items they are, so you can just scan whatever tickles your fancy. The ruckingenur already handles the "research" part, so scanning is really all you need to do.
Completing this objective for the first time gives you the Man with a Scan medal. The medal doesn't unlock anything, but hey, the game's giving you a pat on the back for engaging with some job mechanics. If you had fun finding things to scan for the ruckingenur, why not play with it some more?
Ensure that there are at least two functioning command teleporter consoles, complete with portal generators and portal rings, on the station level at the end of the round.
This is another objective that involves the ruckingenur kit, and this time, you actually need to use it to create a copy of the machines in question rather than just scan them. The "command teleporter...portal rings" part is a clue that you need to copy the machines in the Teleporter Room, rather than replicating the ones in Telescience or building something with MechComp telepads. Likewise, "station level" means that the second teleporter should be somewhere on the ship/station, but where doesn't matter; you could build one in the Bar for all to use or hide in it somewhere in maintenance, and both will satisfy the objective.
The good news is that there's already one functioning command teleporter console, portal generator, and portal ring in said Teleporter Room. The bad news is that you don't have access to it. There's a board in Tech Storage for the console, so you can use that to make another console, but the portal generator and ring might prove an issue. If you mention that you just want to scan things (rather than steal the hand teleporters there), you can probably convince your boss to let you in. (They start with access to that room.) Failing that, you could ask the AI (who can open almost every door), the Captain, the Head of Personnel, the Medical Director, or the Research Director (those also start with access). Alternatively, there's also a full Teleporter setup out in the space/sea diner; getting there is another matter, but it's there.
When you complete this objective for the first time, you get the It's not 'Door to Heaven' medal. Unlike the above, this does unlock something: by using the Claim Rewards command, you can reskin a jumpsuit you're wearing into a unique orange, red, and black "pilot suit".
Make sure all furnaces on the station are active at the end of the round.
You need two things to complete this objective. First, you need some map knowledge: you need to know where all the furnaces are and how to get to them. Second, you need to bring a lot of fuel. Char is considered the default fuel, and furnaces can fit up to 30 char. There's usually a crateful of char near the furnaces. If you need more, don't be afraid to ask the miners for some or buy it from a fabricator/manufacturer if they put some in the RockBox to sell.
For the early and mid round, you don't really have to worry about this objective. When the shuttle is called, though, you need to make your way to every furnace, and ensure each one is on and has enough fuel to burn until the shuttle arrives to CentComm. If any of them are empty or close to it (only one bar is lit up, instead of all four), give them some fuel. If you want to be really safe, you could fill up all the furnaces to full, but this requires a lot of fuel.
It should also be noted you are not limited to just char. In fact, if it can burn, it can probably be used as fuel. Some things are less potent than others. For instance, you may need more paper than char to fully fuel a furnace. There are also things that are more potent than char if you are interested... Such as corpses... Yeah you should stick to just char.
When completing this objective for the first time, you get the Slow Burn medal. This too unlocks something: using the Claim Rewards command, you can reskin a welding helmet into a Hot Rod Welding Helmet.
Make sure all SMES units on the station are at least 20% charged at the end of the round.
You should have no problem with this if you're good at keeping the engine alive. Buuuuuut if the engine does somehow fail, either the incompetence or laziness of your fellow engineers (or if someone blew it up), there is another and very time-consuming way to keep the SMES units charged if you really want this crew objective done for some reason.
This is by ordering a bunch of Portable combustion chambers and hooking them up to the wires that lead to the SMES units. To do this, all you need is a Fuel Tank that is full of welding fuel and a Gas Tank with enough air in it. From there, you just need to turn it on. Keep in mind, the power generated by the Portable Combustion Generators are relatively low, and may not be enough if the APCs are using the SMES to stay powered. As tempting it may be, DO NOT cut the wires to the APCs as a non-antagonist. Depending on what wires you cut, if you shut down medbay to power an SMES, you may get in hot water with the admins. Instead, you may need to hook up more Portable combustion chambers to the SMES, to equalize the consumption and usage.
As of writing this there is no medal or reward for completing this objective. So snap a screenshot and brag to your friends on how you kept SMESes charged! Go on, nobody is stopping you.
Ensure all APC units on the station are operating at the end of the round.
You should follow the above, if you keep the engine running, you should be fine with this objective. Though there are a few added difficulties to this objective depending on the round.
For one, if an area gets blown up, it may sever the wire connection between an SMES and APC, so you must reestablish the connection, otherwise the APC may run out of charge operating a stupid vending machine. So, you must go out and by using copper wire, and building floors for the wire if necessary and reestablish the connection.
If for whatever reason you wish for an APC to have more power inputted into it, you can order a Experimental Local Generator and hooking it up to the APC, instructions are on its respective page linked here.
Like the above, as of writing this, there is no medal or reward for completing this objective. Though, you will probably be very proud of yourself completing this objective, as you done what very little engineers can do: Keep the FUCKIN lights on!
Engineering a Disaster: Antagonist Engineer
Antagonist Engineers often choose to wreak a little havoc using the AI as an assistant. With easy access to tools and gloves, you can easily break in to the AI Upload and give it a law that'll send it on a bloody rampage. You'll have to careful around the stun turrets (which you can't turn off), but they're easy to dodge if you're fast enough. (If you're not, throw a foam grenade into the upload to block them off.) To seal the deal, go to the Computer Core, deconstruct the Robotics Control Computer, and steal the spare Robotics Control Computer board, so the crew can't killswitch the AI.
The power transmission laser can also reach insane levels of power if enough watts are being sent out, to the point that contact causes immediate, absolute disintegration. The flow of the laser is fixed, so you can only take advantage of it in particular places, but it makes for excellent corpse removal and a nice way of executing any stunned or unconscious victims.
With some good engineering knowledge and hotwiring skills, an antag engineer can hotwire the engine directly to the power grid (exactly where will vary from map to map) and weaponize the engine itself. Hotwiring an sufficiently powerful (25 MW or more is a good start) thermo-electric generator setup will overload the station's power network, causing APCs all across the station to spontaneously shock people, stunning them and inflicting burn damage. The greater the power output, the nastier the shocks. This is great way to wreak havoc and sow chaos across the whole station. Just be careful not to get shocked yourself; the APC shocks will bypass your insulated gloves.
Even better, hotwiring also increases the burn damage of electrified doors. If you hotwire a sufficiently high power engine (~55-60 MW), electrified doors will to outright gib people who aren't sufficiently protected. With some good knowledge of door wiring or a subverted AI, you can kill people simply by having them open the wrong door, while the APCs all over the station rain down nasty electric shocks on everyone.
Engineers also make great bombers. Engineering comes with all the welding fluid, metal sheets, and wire you need for to rain pipe bombs upon the station, plus plenty of extra items for unique and deadly effects. Plasma from the hot loop is great for making bomb mixes, especially if you have a good burn going in the combustion chamber. You can siphon it off for your TTVs and single tank bombs simply by wrenching an empty canister (or air pump with plasma tank) onto any of the hot loop ports.
Uncivil Engineer: Traitoring
Given all the above, the job-specific Syndicate Items for Engineer seem almost like slim pickings. Since your job revolves around electricity, two of them involve using it for evil. The first one is a set of power gloves, designed for shooting electricity from your fingers like a Zeus or Palpatine in yellow. The other is a flyzapper implant, which causes you and the machines around you to electrocute people nearby when you die. It also "elecgibs" your corpse with some spectacular effects for a truly shocking last hurrah.
One of the more notable items is the syndicate device analyzer, a scanner that can copy a couple things a regular analyzer can't, like the crusher in Disposals and many (but not all) traitor items. For example, you could mass-produce an swarm of sawflies and wreak havoc with an army of murderbots. In addition, copying things like c-sabers or wrestling belts and leaving/passing them around is a great way to spread chaos and aid fellow antags. Of course, all these schemes are only possible if you have the materials for it.
Traitor Engineers can also buy a syndicate cargo transporter for disposing of containers of evidence (and potentially people) far, far away.
You can also get a lot of mileage out of the generic traitor item list. Floor closets are great for hiding bombs, and signaler implants let you detonate them with style. The cloaking field generator can hide any death traps you've made with MechComp, though it's a bit clunky. Speaking of, the bowling suit does really funny things when combined with MechComp. Using the pickpocket gun to steal things and mess with people is still fun as usual. Trick cigs, electromagnetic cards, and EMP grenades are useful for sabotage-minded engineers. Really, all of them are useful in some way. The only limit is your imagination!
Supplementary Video
| Jobs on Space Station 13 | ||
|---|---|---|
| Command & Security |
||
| Medical | ||
| Research | ||
| Engineering | ||
| Civilian |
| |
| Silicon | ||
| Jobs of the Day | ||
| Antagonist Roles | With own mode | |
| Others | ||
| Special Roles | ||