Difference between revisions of "Chief Engineer"
Studenterhue (talk | contribs) (Add Tech Trainee to the list of subordinate jobs shown in the jobs details header) |
Studenterhue (talk | contribs) (→Equipment: Briefly mention that the aurora belt provides rad protection) |
||
| Line 50: | Line 50: | ||
==Equipment== | ==Equipment== | ||
As the head of the engineering department, the CE will most likely be building, repairing, or breaking ''something'' at some point during the round. That's why you have access to so many tools. You don't have to worry about scourging some for yourself because when you spawn in, you get an [[Engineering Objects#Aurora Belt|aurora belt]] that comes with all the standard engineering tools ([[crowbar]], [[welder]], [[wirecutters]], [[screwdriver]], [[wrench]], [[multitool]], and [[Engineering Objects#Deconstruction Device|deconstruction device]]). When activated, it also completely protects you from the dangers of | As the head of the engineering department, the CE will most likely be building, repairing, or breaking ''something'' at some point during the round. That's why you have access to so many tools. You don't have to worry about scourging some for yourself because when you spawn in, you get an [[Engineering Objects#Aurora Belt|aurora belt]] that comes with all the standard engineering tools ([[crowbar]], [[welder]], [[wirecutters]], [[screwdriver]], [[wrench]], [[multitool]], and [[Engineering Objects#Deconstruction Device|deconstruction device]]). When activated, it also completely protects you from the dangers of heat, cold, and radiation and significantly reduces melee damage. | ||
In your special "Chief Engineer's locker", you get: | In your special "Chief Engineer's locker", you get: | ||
Revision as of 07:24, 19 October 2024
| Command Staff | |
|---|---|
| Chief Engineer | |
 Chief Engineer |
Difficulty: Medium Requirements: None Access Level: Bridge, EVA, Teleporter, Engineering, Mechanics Workshop, Cargo Bay, Mining Department, Mining Outpost, Maintenance Additional Roleplay Access Level: None Supervisors: Captain Subordinates: Engineer, Miner, Quartermaster, Tech Trainee Responsibilities: Supervise and lead the engineering department, work with other departments if necessary, maintain the station/ship and its power supply, oversee cargo and mining operations, help your subordinates Guides: AI Laws, Calling the Escape Shuttle, Construction, Engineering Objects, Power Grid, Thermoelectric Generator, Singularity Generator, Geothermal Generator, Nuclear Generator, Catalytic Generator, Gas, Guide to Wiring, MechComp, Cargo Crates, Guide to Mining, Ore Processing, Ruckingenur Kit, MechComp |
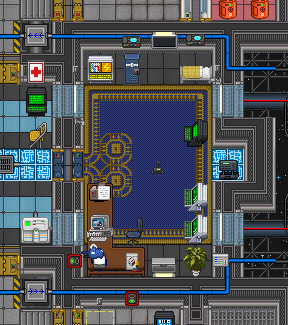
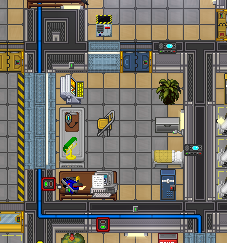
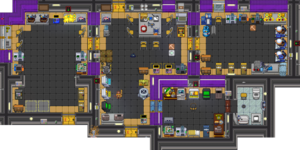
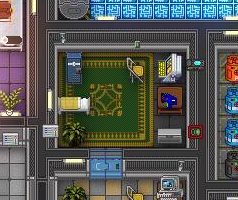
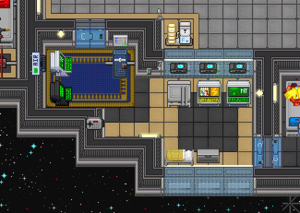
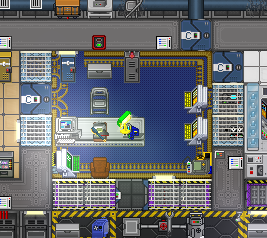
The Chief Engineer is the head of the engineering department, which consists of the engineers, quartermasters, and miners. They start with special gear and EVA access to help patch up hull breaches quickly and safely, or to go on wild adventures and get lost in the dangerous depths of space.
Equipment
As the head of the engineering department, the CE will most likely be building, repairing, or breaking something at some point during the round. That's why you have access to so many tools. You don't have to worry about scourging some for yourself because when you spawn in, you get an aurora belt that comes with all the standard engineering tools (crowbar, welder, wirecutters, screwdriver, wrench, multitool, and deconstruction device). When activated, it also completely protects you from the dangers of heat, cold, and radiation and significantly reduces melee damage.
In your special "Chief Engineer's locker", you get:
- A pair of magnetic boots to protect you from space wind and from slipping. Activating them and setting your intent off of Help also prevents people from pushing you or swapping places with you, which is helpful for crafting and other things that require you to stay still.
- A flash to keep your unruly subordinates in check. There is one in your locker and one in your backpack that you spawn with.
- A engineering space suit and helmet set (or diving suit and helmet set for Oshan Laboratory) for doing work outside of the station/ship or fixing hull breaches that have depressurized a room.
Said locker also has some extra engineering equipment just for you, so you don't have to fight with your underlings to get your own. It includes a multitool, a mechanical toolbox, an extra pair of insulated gloves, a welding helmet, and a firesuit.
You're also free to help yourself to anything in EVA, such as the RCD, though you also start with one in your office.
In addition, you start with the Engineering Training trait. It's not exactly a tool, but it is something useful, because it halves the time it takes to do certain constructions and deconstructions, e.g. building a table. This does not stack with Carpenter's similar bonus, so you can't take both and deflect questions about your qualifications (or lack thereof) with light-speed crafting skills.
As a little bonus for being a head of staff and as a compensation of all the suffering that comes with that, you get a nice little pet, Rocko, a rock, to keep you company in this deadly journey of making the engine burn brighter than a a sun. Rocko occasionally spawns as a material other than rock, and his material hardness slightly affects his damage when used as a melee weapon.
Engineering Radio Channel
The chief engineer has access to a chief engineer's headset with a access to the engineering department frequency and the command frequency as well as the general frequency. To use it, simply type:
say :e Can someone help patch up the Bar while I rescue the miners?
say :c I'm taking the spare RCD ammo from EVA.
say ; Please do not enter the engine room, as it is currently three million degrees inside.
These message won't be broadcast over the normal radio channel. However, someone standing close to you can hear messages you say into the radio. You can also press Y as a shortcut and select the channel that you want to speak into from there.
Standard Operating Procedure
Get Geared Up
Go to your office if you didn't spawn in it and open up your locker. Dump any unnecesary items, as you will have lots of tools to carry around and will appreciate every bit of inventory space. Equip the aurora belt and magnetic boots and stuff the engineering space suit and helmet set into your backpack. You will probably end up fixing an airless room or being in space, so you may want to equip your breathing mask and get your emergency oxygen tank filled up.
Start & Maintain the Engine
The first thing you should do is go to Engineering and check whether the engine is being started. If it isn't, you should obviously start it, and get any nearby Engineers to help you. Most maps use the Thermoelectric Generator. The exceptions are Oshan Lab, which uses the Geothermal Generator; Nadir and Clarion, which use the Nuclear Generator; and both the Donut maps (Donut 2 and Donut 3) which have a Singularity Generator. In any case, if you don't set it up, the station will gradually lose power and begin failing. The lights will go out, doors will stop responding, and life-saving technologies, like cloning and communication links, become nonfunctional. As their boss, you have the final say on how the engine gets configured, though as long as it isn't obviously non-functional or dangerous you generally don't need to micromanage everything the engineers try to do.
Set Up the Solars
Setting up the solar arrays is optional, as if you've done the previous step then the engine should be making more than enough power for the station and the engine SMES units should have enough stored power for you to restart the engine if it goes offline. The solar arrays typically aren't making enough power to cover load, and their intermittent output will take an extremely long time to charge the SMES units any useful amount. They can also be easily sabotaged by a snipped wire or permanently put out of operation by an explosion.
However, if you do wish to set the solars up, the process is very simple. Just find the solar array SMES units and set their I/O values to something reasonable and make sure the SMES units are on. Alternatively, you can skip the SMES and wire the solars directly into the power grid, as they don't make enough electricity to be harmful to the station. The AI is able to set the solars remotely, so it would probably be a better usage of your time to just ask them to do it if you don't want to hotwire them.
Repair the Station
It's also important to ensure the station stays intact and fix any damages and breaches that occur. You have a rapid construction device that makes repairing broken walls, floors, windows, and doors a breeze, though broken wiring, pipes, computers, and other equipment will still need to be repaired manually. In addition to the aforementioned magical RCD, you also have a vast stock of construction equipment and supplies in Engineering Storage, access to the Mining Department & the Cargo Bay to replenish it all, and access to the Mechanics Workshop to replace any lost electronics.
Fixing the AI
While all heads of staff have access to the AI upload chamber, you are the only one who is always carrying around a welder and screwdriver and thus are the best equipped to add and remove AI law modules. If some antagonist has fortified AI upload to delay the AI being fixed, you can use your RCD to easily cut through the walls instead. In the event of a law rack corruption event, you can also use your multitool to restore the AI laws to their original states.
Watching the Workshop
You should also keep an eye on what's going on in the Mechanics Workshop. Check in every now and then to make sure that someone filling the halls with deathtraps or some other nefarious device. As a head of staff you can lock specified blueprints from being printed at a ruckingenur kit and can delete added blueprints from fabricators, which may be helpful if they've scanned a laser rifle or something equally illegal.
Managing the Other Engineering Department Jobs
Aside from the engineers that you work with directly to set up the engine, two other jobs are also under your command: quartermasters and miners. All two are generally able to do their jobs fine enough by themselves, but your position of authority and enhanced access can coordinate them to be even more effective. If nothing else, you should check in to make sure that each job has at least one person working there who knows how to do their job. If your department is lacking people in a certain job, you also have access to a specialized ID computer within your office which allows you to grant access to your department in the form of job changes or granting specific accesses within your department's Access Levels list, or demote members of your department to a Staff Assistant, as well as granting EVA access in the event of emergencies.
Miners
Miner is a position that often attracts new players, so make sure that they know how to not irradiate themselves to death and aren't processing every ore they mine into their own fabricator. Check in on the rockbox and make sure that ores are set to sell and are being sold at a reasonable price. You could also use your cargo access to get them some first-aid crates to help them deal with radiation before they get industrial armor. You could grab a tool and mine some rocks yourself, though this is rarely necessary and never expected of you.
Productive miners can be surprisingly helpful for you. If they've got the spare materials, you could swap out your engineering spacesuit for an industrial version and swap your magnetic boots for mechanical boots. Molitz and plasmastone are used to make oxygen and plasma gas canisters respectively, and Molitz Beta may have an application in your burn chamber setup.
Quartermasters
Quartermasters are primarily concerned with making money and fulfilling orders from the crew. They typically have everything they need in order to do both of these things themselves, so your intervention is rarely necessary. They can make a significant amount of money by selling ores that are doing well on the market, so the best way to help out the quartermasters is to make sure that the miners are doing their job and have the rockbox set up. Sometimes the quartermasters can buy a crate and immediately resell it at a profit, in which case the amount of money they can make is only limited by how fast they can import and export crates. You could use your Mechanics Workshop access to build a teleporter and/or graviton system to help them export crates significantly faster.
Crew Objectives
As a loyal crew member, you can sometimes be assigned some strictly optional objectives to keep yourself busy while you wait for something to happen. As a chief engineer, you can expect to see the following:
Make sure all furnaces on the station are active at the end of the round.
This is simple enough. The default load of furnace fuel you start with is often enough to last you through the whole round, or at least a good 45 minutes of it. Should you need more, don't forget that you have access to the Mining Department and all the char and plasmastone obtainable through it. In addition, the furnaces can accept many, many other types of combustibles: wood planks, weed, paper, clothing, people...
Obviously, this objectives encompasses any furnaces in Engineering, but it also considers any that might be in the Sauna. If you're on Cogmap2 or Oshan Laboratory, don't forget about the furnaces in the Research Outpost.
Completing this objective for the first time gives you the Slow Burn medal, which unlocks a sweet-ass flames paintjob for welder helmets. It's only appropriate that an objective that involves fire gives a reward that also involves fire.
Make sure all APCs on the station are charging at the end of the round.
Unless someone has snipped the wires to an APC, this will probably happen by itself if you've done your job. Check the power monitoring terminal to make sure that all APCs are charging or charged before boarding the shuttle.
Make sure that all SMES units on the station have at least 20% charge at the end of the round.
Very similar to the APC one in that it will probably happen by itself if you do your job. Remember to get the solar SMES units charging, either by setting the solars or by wiring them into the engine.
Earn at least a million credits via the PTL.
PTL refers to the power transmission laser, which basically takes power and outputs it as a laser that brings money to the station. Some configuration is required, first to actually get the laser up and running, later on to adjust its power to engine output. You can always check how much money it's earned by clicking on the PTL and scrolling down to "Lifetime credits". Note that it tracks amount earned, so if someone spends/steals all the money, it won't prevent you from satisfying this. The PTL can also be turned off once accumulated its million.
Unless you have supernatural powers, this is going to involve some measure of collaboration with other members of Engineering, on all the main engine types. For maps with the Thermoelectric Generator, it'll most likely in some way involve setting up and maintaining a hellburn or pipeburn with other engineers. For maps with the Geothermal Generator, it's good idea to ask Miners to mine under hotspots you're harvesting, on top of getting other engineers to find and harvest hotspots; knowing how to stack hotspots definitely would help. For maps with a Singularity Generator, you'll probably need to come up with some system for feeding things into it, perhaps with the help of the tools in Mechanics Workshop. Basically, find some way to significantly boost engine power.
In addition, any setup can make a million if given enough time. Suffice to say, recalling the shuttle repeatedly, murdering people trying to call the shuttle, or otherwise ruining people's fun so you can watch the number on the PTL go up is a big no-no. It's not worth it.
The E Stands for Evil: Antagonist CE
As an antagonist CE, you can do one of two things. One option is to simply deny the station power by never setting up the engine and disabling the solars - which will cause a complete power failure after around 30 minutes. If you are in the mood for real mass destruction, hotwire the engine and produce so much power that the APCs shoot lightning at nearby people, and electrified grills and airlocks shock people so much they explode!
Remember that the furnaces are the best hiding places for bodies - toss them in, and nothing can ever recover them.
As CE, you are authorized to enter the AI upload. You don't even have to go through the trouble of hacking in to subvert it to your whims! As boss of the engineers, you won't raise any suspicion in keeping a close eye on those who can undo your troublemaking.
And The C Stands for Crime: Syndicate CE
Traitor Chief Engineers can order five job-specific items, most of which revolve around murdering people: power gloves, the flyzapper implant, the syndicate cargo transporter, the AI laser upgrade module, and the Disguised AI Law Module.
Based on its name, you might be expecting power gloves to be gauntlets that boost your punches or perhaps a curious gaming peripheral with horrible handling, but it's neither: instead, if you're standing over a wire, it lets you shoot lightning wherever you click! Disarm makes said lightning a non-lethal stun, and Harm makes it cause BURN as you might expect from lightning. The gloves get much more powerful the more electricity there is in the grid, so it also rewards you for being a good engineer too. Goes well with the otherwise rather niche T-Ray scanner.
Meanwhile, the flyzapper implant is essentially a microbomb but with a shocking twist. This implant makes it so that when you die, you and the machines around you zap the people nearby with electricity. The effects scale with number of flyzapper implants in you (and luckily, they're pretty cheap), but not amount of electricity in the powergrid. It also gibs your corpse with some cool visual effects to make your literally electrifying last moments all the more memorable.
In contrast, the syndicate cargo transporter can be both a tool and weapon. When used on a locker, crate, or similar large container, it welds it shut and sends it off to somewhere far away. It's technically possible to retrieve the container, but good luck finding it. In addition to the obvious use of stuffing someone into a locker and then teleporting them away to die, it also has various other applications. Have a dead body you need to dispose? Stuff 'em in a locker and watch it disappear. Need to get rid of some incriminating evidence? Send it away with the transporter. Just want to fuck with people? Teleport away random lockers and crates and see if people notice.
If you like to subvert the AI and Cyborgs and watch them rain down cybernetic terror, AI laser upgrade module might be up your alley. This unimposing-looking circuit board gives the AI(s) the ability to fire lasers from its cameras. Just insert it into the law rack in the AI Upload, and there you go. To make it harder to remove in case someone realizes that cameras normally don't shoot lasers, it'd a good idea to screw it in and weld it into the rack. While you're there, you might also want to modify the AI and cyborg laws to allow them to murder people (consult AI Laws!)
Finally, if you like tinkering with AI Laws in general and wish there were more Freeform modules available so that you can make more complicated lawsets, the Disguised AI Law Module is the item for you. This "AI Law Module - 'Disguised'" is color-coded green, so it looks like a standard Asimov law module, but it's actually a Freeform module, meaning you can give it whatever law you want. Don't forget, you can order multiple of these (or make use of a syndicate analyzer), so you can create the lawset of your wildest dreams. It's great if you want to put said AI laser upgrade module to good use or just want more options when subverting the silicons.
Supplementary Video
| Jobs on Space Station 13 | ||
|---|---|---|
| Command & Security |
||
| Medical & Research |
||
| Engineering | ||
| Civilian |
| |
| Silicon | ||
| Jobs of the Day | ||
| Antagonist Roles | With own mode | |
| Others | ||
| Special Roles | ||
