Getting Started
- Too much to read in too little time? Try this this quick tutorial made by admin that can be read in just a few minutes!
So, you've never played the game before and you're looking to get started. Sweet. New players are totally awesome and there are a ton of people playing on the servers who would love to help you get going. However, even they can't help you if you don't have an understanding of how the very basics work. Let's get started on that!
What is Space Station 13?
Space Station 13 (SS13) is a multiplayer sandbox role-playing game where anything that can happen will happen. It often draws comparisons to Dwarf Fortress for its vast complex systems that interact to create emergent play or Mafia/Werewolf-type games with its few-vs-many PvP interactions, but these really cannot do the game justice. SS13 is one-of-a-kind, and there is no other game that like it. It's also free--and always will be! Not "free to play, pay to skip grind" or "free to play, pay to be competitive", but the good ol' fashioned "free as in free beer".
There are many versions of Space Station 13. There is not a single vanilla version with many mods but rather different versions that might share some communities or ancestry but generally otherwise have different mechanics, lore, histories, and staff. Among other implications, this means there is no "the" SS13 wiki, and if you read something on, say, the /tg/station wiki, there is a 95% chance it will not apply to here, and vice versa.
This page is about a version of SS13 called "Goonstation". If you've ever heard stories about clowns juggling entire humans, talking robot butts made from unholy abominations, or a sentient sandwich with an unfathomably long name, this is the place where they happened. While the "Goon" in "Goonstation" comes from the Something Awful forums, whose members are called "Goons", you do not have to join Something Awful to play here; in fact, very few people have, and Goonstation and Something Awful are basically independent of each other.
Connecting
Step 1: Download BYOND
Build Your Own Net Dream (or BYOND for short) is the platform that Space Station 13 runs on. We aren't going to lie - it's pretty bad. It's mostly held together with equal parts duct tape and prayer, and it took numerous attempts to work around the slipshod code to make it so it could be played with minimal latency. You will likely be cursing BYOND at least once. The sooner you get used to this, the better off you'll be.
It doesn't really matter whether you pick the .zip or .exe file. Both give you basically the same BYOND client. But installing by the .exe will allow you to join servers via links in an internet browser, such the ones on this very wiki's main page or Goonhub.
Step 2: Log in
As we don't allow guest accounts to join our servers, you'll have to register an account with BYOND and log in to it on your fancy new BYOND client. If you miss this step, you'll probably get a "connection closed" error.
Step 3: Find the appropriate server
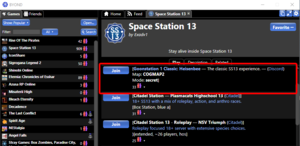
Since the vanilla version of Space Station 13, many servers have branched out in their own ways and developed many different ideas. Many have borrowed code from one another, but most of them are different in some way. Given that you're reading up on Goonstation, you're going to want to look for something that at least has Goonstation in the title, the current game mode for that server (e.g. "mode: secret"), and a Discord link. There are currently four official servers:
- Goonstation 1 Classic: Heisenbee byond://goon1.goonhub.com:26100
- Goonstation 2 Classic: Bombini byond://goon2.goonhub.com:26200
- Goonstation 3 Roleplay: Morty byond://goon3.goonhub.com:26300
- Goonstation 4 Roleplay: Sylvester byond://goon4.goonhub.com:26400
You may also find some "Goonstation Development" servers or servers running Goonstation code by some other name. These are all unofficial servers, so your mileage may vary. Despite the "Development" in the name, these are not used by Goonstation's developer team.
All servers are based off the same source code, and the differences between these four servers primarily surround roleplaying. Goonstation Classic servers do not require roleplay, but it is appreciated--and remember, just because there aren't rules about roleplaying doesn't mean there aren't Rules. Meanwhile the Goonstation Roleplay servers do require roleplaying and have some light (but very important) RP Rules to regulate it, in addition to standard Rules set, and the motives, a basic simulation of hunger, thirst, and hygiene. Goonstation Classic 1 isn't any different from Classic 2, rules or mechanics-wise. Same goes for Goonstation Roleplay 3 & 4; there isn't one that's "motives are tougher" or "RP standard is lighter", both have same rules and mechanics. There are no player caps.
In terms of experience for newbies, all four tend to have lots of friendly faces would be happy to show you around if you clarify you're new around here, and wherever you go, you'll probably have a good time. There can be different amounts of people on the server, and player counts can affect how laggy the game is, depending on your connection and computer, and obviously, you can find different community members on each server.
If you can't connect via the BYOND Hub, try clicking the links on the Main Page or Goonhub or directly connecting to the server through the Open... button in the top left above the list of games. The addresses are above.
Fundamentals
Game Startup
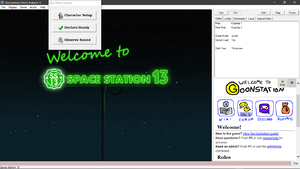
Successfully connecting to a server will bring you to the screen shown to the right. It's very likely that you'll catch any given server in the middle of a round. The menu options when you just join are:
Character Setup -- Has a bunch of options to choose from, which is broken down into the collapsible below:
| Option | Description |
|---|---|
| Profile name | Sets the profile name of your current save file. |
| Character name | Sets the name of your character in game. |
| Random name? | Y/N - if you want your name randomized every round. Picks from a pool of unusual names. |
| Random appearance? | Y/N - ditto, but with your appearance. Does not randomize gender. |
| Gender | Purely cosmetic, as you can still wear women's clothing as a male, or have a full-grown wizard beard as a woman. |
| Age | Has very minor effects in the game, one of which affects the tone of your voice clips, which are used for stuff like screaming, gasping and farting. |
| Blood type | Has a minor interaction with MSG, but otherwise has no effect. |
| Bank pin (Randomize - Y/N) | Sets the pin of your ID card for use at ATMs. Check your Notes in the command tab if you forget it. Can be selected to be randomized. |
| Security Note | Whatever you put here shows up as an Important Note in your Secmate record. It has no effect on gameplay and is entirely for roleplaying purposes, so put whatever you'd expect a Security record to have, like the one time you ran a gambling ring or attended a Harambeist party rally. |
| Medical Note' | Whatever you put here shows up as an Important Note in your MedTrak entry. Again, it's entirely for enhancing roleplaying and is meant for things like mental disorders your character has/may have or medications they're on and what conditions they're treating. |
| Fart Sound | Choose between shrill squeak to a more trumpety sounding bowel movement. |
| Scream Sound | Unfortunately no Wilhelm scream option, but plenty of pained yelling to choose from. |
| Chat Sound | Choose what tuba clip you'll make when talking as a human. |
| Occupation choices | Allows you to choose which jobs you would prefer to have or not have. Until you get a hang of the game, you probably don't want to mess with tricky jobs. If you set a job as "Unwanted", you are usually guaranteed not to get it - you'll be a staff assistant if nothing else is available. If the game has already begun, you don't need to bother setting your Occupation Choices, since you'll be choosing your job from the late available list.
Down on the bottom are the Antagonist options. By default, all of them are unchecked, which means you won't spawn as those antag types at roundstart. (You can spawn as late-joining antagonist, but it's nothing you should worry about.) You can leave these that way until you've a better grasp of the game. |
| Trait choices | Gives your character a bunch of buffs and debuffs or if you want your character to hefe-a eccent Bork Bork Bork! Please note that in order for your character to have more than one buff you'll have to balance it out with a debuff. Recommended that you don't mess with these settings until you get a full understanding how useful (or detrimental) this would be to your character. A list of traits and their particular mechanics can be found here. |
| Appearance | Customize what your character looks like, from skin color, underwear to hair and general features. Click on the arrows to get different views of your character. Note that your characters details can be changed by the Barber, or can be changed completely by the Geneticist. |
| HUD style | Changes the appearance of your Heads Up Display. There's not much difference between each style besides colors used, so free to pick one that suits your tastes! For more info on your HUD see below. |
| Targeting cursor | Changes what your targeting cursor will look like. This cursor is only used in abilities such as wrestler or wizard's spells, etc. |
| Display OOC / LOOC chat? | Displays whether Out of Character speak is displayed. OOC is enabled pre-round and at round end, mainly for discussion about the previous or previous round. LOOC is Local OOC, however, this is essentially obsolete. Best to keep these both on, you can always toggle OOC on/off in the Commands tab. |
| View Changelog automatically? | Automatically displays the Changelog upon booting up the game. The changelog displays new updates to the game. |
| View score info automatically? | Automatically displays a bunch of interesting information (such as the amount of corpses, richest escapee, if the station was powered, etc) at the end of the round. |
| View tickets/fines automatically? | Automatically displays the list of recorded "offenses" by Security at the end of the round. |
| Queue Combat Clicks? | The game has a minimum wait time in between actions for balance reasons. If you click during the post-action delay, the action will be executed as soon as the delay ends. Basically, you will only have to click once on stuff, while with before during the action delay clicking something may not be registered. |
| Admin music volume | Occasionally admins will play music in the background, or players may be given DJ status to allow play music themselves. Either way, this option allows you to change the volume of the music playing. Note that you can adjust the music volume in-game via Adjust Admin Music Volume or mute it entirely via Stop the Music!, both of which are in the Audio menu in the top left corner of the game window. |
| Radio Music Volume | This option lets you control the volume of the server-wide music/ads playing at the radio station somewhere in the Debris Field. You can also adjust the volume in-game via Adjust Radio Music Volume or mute it entirely via Stop the Radio!, both of which are in the Audio menu in the top left corner of the game window. |
| Display Tooltips? | Tooltips basically give you a quick rundown of an item when you mouse over it, which can be nifty for a few items. If these get annoying, set this option to Disabled, or set it to ALT, where tooltips will only display if you hold Alt over an item. |
| Default to WASD mode / Use AZERTY layout | Change your keyboard layout. WASD/AZERTY layout has different keyboard shortcuts, which can be found here. |
| Preferred map? | A few minutes before the round, the server opens up a poll for the next round's map. You'll automatically vote for whatever map you set as your preferred here, unless you manually select for a different one. |
| Save/load profile / cloud saving | Saves/loads your customized character, with 5 slots available. Occasionally BYOND likes to forget that you even saved your profile, resulting in most if not all of your data going AWOL. A fix for this would be to use my cloud save function, as this is saved externally. |
Declare Ready -- Hit this to play. If the round is in the pre-game countdown, you will be assigned a role based on your preferences and placed in your workplace when the game starts. If the round has already begun, you'll get a popup asking you to pick an available job, and you will begin on the arrival shuttle.
In addition, whenever you hit Declare Ready, you'll also get a popup asking you if want to spend some Spacebux for the round. Spacebux are an out-of-game currency Goonstation awards you with for playing through rounds, and you can spend them on a number of cute little trinkets and baubles. Feel free to skip it; it's nothing to worry about.
Observe Round -- Fly around as a ghost and see everything that's going on. If you choose this, you can't switch to being a player until the next round.
The UI
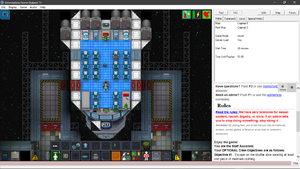
The user interface is a bit tricky at first.
The left side of the screen is the game window. It is centered on your character. You can move around with the arrow keys, or toggle WASD mode via Game -> Interface. The right side of the screen is the info box and chat window. At the bottom of the screen is a text parser where you can type in what you want to say or certain commands.
- To talk out loud, you say "whatever" or press the T key.
- To talk over the radio, you say ";whatever". For more info, check out How do I speak on the radio?!
- To get help from a mentor, enter mentorhelp and a popup box will appear. You can also press F3. Please do not confuse this with adminhelp, which is for issues related to the rules, also please do not ask if mentors will kill somebody for you.
Interacting
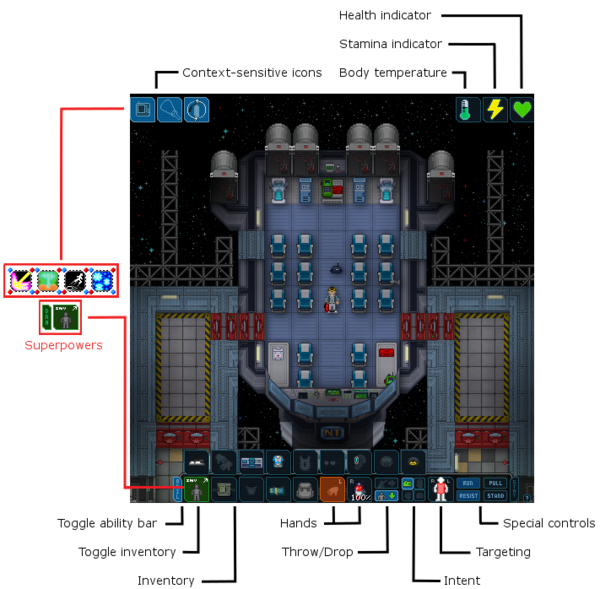
In the game window, left clicking is the basic interaction. It's based on your hands. At the bottom of the screen is your character interface. You have a right and a left hand, and the highlighted hand is your current active hand. You can click your other hand slot to switch hands. PgUp, E in WASD Mode, X with /tg/code keys on and the MMB all switch your active hand too.
How your character interacts depends on what's in your hands, what you are interacting with, and what your intent is - the four small, colored hand icons. Clicking something with an empty hand will often try to pick it up (if an object), use it (if machinery), or shake/grab/punch it (if another player or creature). If you have something in your hands, you will attempt to use it on whatever you're targeting. Things in the world react differently to different objects, and if nothing else happens, the default action is to simply hit the targeted object with whatever is in your hand (so be careful about clicking other players with anything that might be mistaken for a weapon). You will get feedback on your actions in the chat window (not illustrated) on the right.
Right-clicking on a thing brings up a menu list of verbs. Common verbs are Examine (gives a description of whatever), Pull, Pick Up, or Drop. Verbs may change depending on the object and how close you are to it.
Equipment & Indicators
The row at the bottom of the screen shows your equipment and Inventory. You can click the toggle inventory (INV) button to bring up/close an extension showing equipped clothing. If you click the INV button with something in your active hand, you will automatically equip it if possible. If there is already an object in the relevant spot, it will switch places with whatever is in your active hand. If you're accessing the inventory of something you're wearing, e.g. a backpack, it'll also try to store it in there. If you don't, it'll try to put it in your pockets.
Your backpack, belt, and pockets are extra places to store things. Simply click an empty slot with your active hand to stow away whatever you've got (if it will fit). Clicking your backpack with an empty hand will bring up a small window showing everything in it, and dragging and dropping the sprites of the items inside will move them around the backpack's inventory. The contents of backpacks and other hand-held storage containers (box, briefcase, toolbox, belt, first-aid kits and certain pill bottles) can be dumped out in a pinch. Hold the container in your hand and then drag & drop it onto a table or floor tile. You can also take things out of a container without picking it up by dragging and dropping it onto your character.
At the top right-side corner of the game screen is the health indicator. You begin at 100 and your indicator will turn red as you take more damage. If you enter critical health, you will occasionally lose consciousness and be unable to interact until you recover. Other health indicators may appear adjacent and typically mean that there is something wrong/dangerous about the area you are in.
Also located there is the stamina indicator, which governs your endurance. By default, your stamina total is 200 and regenerates at a rate of 10 per tick - click on the indicator to find out about your current status. Every offensive or defensive combat interaction with a player (like attacking or disarming them) will drain stamina. You may also use stamina to move significantly faster by holding the SHIFT key. Once your stamina reaches less than 0 you will be unable to talk, stand up or even interact with any items. Your odds in combat can be improved with a variety of drugs and by wearing protective clothing.
Body temperature is another important aspect. If it's too cold, you'll move at a crawl. You'll take burn damage as well when you're standing on a space tile. This status takes a while to go away, even if you move into a room with a normal temp. Space HVAC units, certain exosuits and hot beverages will help you heat up. If it's too hot, that's usually an indicator that you're on fire. If you can't find a fire extinguisher, use the stop-drop-and-roll technique. To do this, click the RESIST button, which will automatically make you roll until the flames have been extinguished.
Context-sensitive icons can appear in the top left-side corner of the screen. Many items have a unique HUD icon, such as portable light sources or gas tanks. Holding a fire extinguisher gives you the option to spray foam all around you, for instance.
The toggle ability bar button is only relevant if you have superpowers. It will add one or several clickable icons to the top of the screen, each representing one of your genetic abilities. Content-sensitive and superpower icons cannot be displayed at the same time.
Other Controls
There are other buttons on your main interface:
- Intent settings determine what you will do when you interact with another person or creature and have an empty active hand.
- The top left/green hand is Help, which will shake someone up or attempt CPR. The hotkey for help intent is 1.
- The top right/yellow hand is Disarm, which tries to knock something out of someone's hands. The hotkey for this intent is 2.
- The bottom left/orange hand is Grab, which is aggressive and can lead to choking someone. Hotkey is 3.
- The bottom right/red fist is Harm, which will punch or kick someone. And the hotkey for this intent is 4.
- The small picture of a person is the target settings. It determines which part of the body you want to target when you are interacting with another player. You don't really need to worry about this if you're just starting out, but it is essential for surgery.
- Throw toggles throw mode. Once in throw mode, clicking on a floor tile/person/etc will then throw the item in that direction. You can toggle throw mode by SPACE, X if you're in WASD Mode, or R if you have /tg/code keys on.
- Drop is also fairly straight-forward. You'll drop the item in your active hand on whatever tile you're on. The WASD hotkey for this is Q.
- Run/Walk toggles between movement speeds. You generally want to stick with run.
- Pull will, depending on the interface style chosen, will have an orange border or be highlighted if you are currently dragging something, and you can click on it to release the object. The keyboard shortcut for this is the CTRL key.
- Resist has a few specific applications, such as slowly putting out a fire if you're on fire, breaking out of handcuffs or shackles, and escaping from aggressive grabs.
- Stand/Rest toggles between standing up or lying down and crawling. This is also the button to use when you're asleep in a bed and want to wake up.
- Use C uses the item currently in hand. Can't be used if the item in hand needs to be used by clicking on another person.
Gameplay
Getting Around
When you join the game before roundstart, you will spawn in either your workspace (depending on whatever job you've been assigned), or, if you're on Clarion or Destiny, one of the many crew dorm rooms. If you join after a round's started, then depending on the map, you will spawn on the arrival shuttle (Cogmap1/Cogmap2), pop out of the industrial cryogenic sleep unit (Clarion/Destiny), or find yourself in a pod careening straight into the Arrivals area (Oshan Lab).
In any case, you don't have to worry about doing your job or anything like that. The AI, security officers, and the captain have some obligations to be aware of, but otherwise, you're free to wander around exploring at your leisure. Take some time to familiarize yourself with the station. Feel free to ask a local crew member or ask over the radio for help if you're lost.
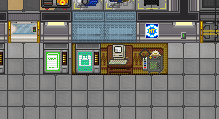
If you want a guided (and commentated!) tour of the station and some of the sights you may encounter, look above the "Space Station 13" sign in arrivals hallway and embark on a tour with Murray, the station's local robot tour guide. Not only will you be entertained, but you'll also get a good rundown of the most important places on the station.
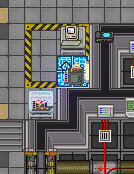
If you want a guided (and commentated!) tour of the station and some of the sights you may encounter, check out the right side of arrivals for Murray, the station's local robot tour guide. (The first one to be created, in fact.) Not only will you be entertained, but you'll also get a good rundown of the most important places on the station.
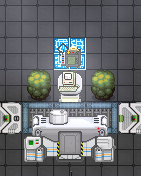
If you want a guided (and commentated!) tour of the ship and some of the strange yet wonderful sights you may encounter, start a tour with Mary, the local tour guide robot just above the industrial cryogenic sleep unit. Not only will you be entertained, but you'll also get a good rundown of the most important places on the ship.
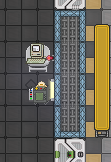
If you want a guided (and commentated!) tour of the ship and some of the fantastic sights you may encounter, join a tour with Mary, the local tour guide robot just outside Arrivals. Not only will you be entertained, but you'll also get a good rundown of the most important places on the ship.
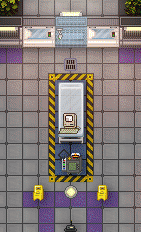
If you want a guided (and commentated!) tour of this vast station and all the oceanic wonders within, go to Arrivals and start a tour with Moby, Oshan Lab's stylishly-adorned robot tour guide. Not only will you be entertained, but you'll also get a good rundown of the most important places on the station.
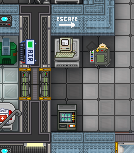
If you want a guided (and commentated!) tour of this vaguely torus-like space platform, go to Arrivals and start a tour with Marco, Kondaru's Mitigative After-Rest Crew Orientation unit. Not only will you be entertained, but you'll also get a good rundown of the most important places on the station.
Your job determines your access level, which determines what doors will or won't open for you. If you get trapped somewhere, you can ask the AI for help over the radio.
say ;AI, please open this door!
Make sure to enter this into the text parser below the game window. That semicolon is crucial. Don't worry about quotation marks, the game will automatically add them for you.
To move, use your arrow keys. You can also toggle WASD mode at Game -> Interface to use the WASD keys to move instead. To open a door, just walk into it or click on it when you are standing next to it.
What's Going On Here???
The average Goonstation round goes as follows:
- Players are assigned their jobs.
- Some players are assigned to be antagonists. There is a variety of them, including stealthy traitors, spell-flinging wizards, DNA-stealing changelings and nuclear operatives trying to blow everyone up.
- Some players are assigned to be miscreants. They have a variety of special miscreant objectives, such as giving bribes, starting strikes, and paint the whole station pink, with the general aim of being a creative nuisance.
- Players do... whatever. They might do their jobs. They might wander off and explore space. They might mess around and build stuff. They might run gimmicks.
- Antagonists do... whatever. They might work on their objectives. Or they might just cause chaos. They're free to do whatever, including harming/killing other players.
- Miscreants do... whatever. They're given a bit of leeway to do rude and obnoxious things so long as it fits their miscreant objectives and follows the rules.
- At some point, the emergency shuttle will be called to evacuate the station. It will arrive in 6 min, wait for 2 min and then spend 2 min in transit, during which you can be thrown from the craft and killed, so be careful and buckle up! Arriving at Centcom ends the round. The round may also end automatically when certain conditions (see Game Modes) are met.
Hazards
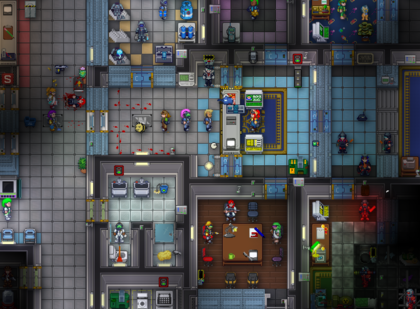
Even as you're getting used to the basics, shit may be going down. You may deal with environmental hazards, like gas leaks, fires, hull breaches, floods, or hazards from other players. Security may hassle you for wandering into a restricted area, and there are plenty of antagonists around causing mayhem. Until you have an idea how you should act, you should generally just try to run away, call for help, and don't worry too much. The worst thing that can happen is you die - but even so, you can still observe the round, chat with other dead players, and play once the next round starts. Plus, there are plenty of ways to get back into the game; Medical personnel might find your body and clone you if certain conditions are met, or a Roboticist might take your brain out of your body and bring you back as a Cyborg or AI, just to give some examples.
If you're stuck somewhere or want to learn how to do something, you have some resources:
- Experimenting (may result in
fundisaster). - This wiki.
- Talking to other folks in your department.
- Asking for help over the radio. Remember to put a ; before what you're going to say to say over the radio.
- Asking for help using mentorhelp with F3. Mentors are there to answer whatever gameplay questions you've got.
If you're being griefed or killed unjustly you can ask for help with adminhelp. Admins won't tell you straight-up if the person who is hurting you is an antagonist or not but check to see if it's justified. Even if no admins are on, adminhelps will still reach the Goonstation admin Discord channel, and there's nearly always an admin in there. If you don't get a response/reply, don't be afraid to send in more adminhelps. The admins may not take immediate action, but they will take notice of the issue.
Timing
A round of SS13 can last anywhere from 10 minutes to several hours depending on the mode of play and the shuttle call, but a typical round lasts about 45 minutes to an hour. If you need to go, it's more polite to suicide rather than just disconnecting, since that way people know you won't be back. If you feel super polite, you could drop your ID in a public area or hand it off to someone else so they can do your job (unless you're an assistant). Killing yourself in a way that takes others with you or calling the shuttle because you want to go are both very inadvisable things to do.
If you're the AI, leaving in the middle of a game can cause real problems, so please use adminhelp to say you're leaving as an AI.
So what happens if you die 10 minutes in? SS13 has mechanisms to prevent a round dragging too long; Random events steadily get worse over time. If your body survived, you can be cloned back into the game; if at least your brain survived (in your body or otherwise), you can be brought back as a cyborg, which means you'll have different objectives, but you can still play. As a newbie, it can be a good opportunity to ghost-observe someone doing one of the other jobs. You can also become a Ghostdrone and help fix the station. If all antagonists die early, the game may appoint new joiners as antagonists or respawn ghosts (listen for the klaxon sound!) as various enemy roles. Sometimes, an admin may reactivate dead players as new antagonists as well. All in all, it can be worth leaving the game open even if you just want to wait for the next round.
RP Mechanics
The roleplay server is slightly different from the main server in that it uses a Motives System (pretty much The Sims meets SS13). This system incorporates hunger, dehydration, and hygiene, and maintaining all of these is important to both gameplay and roleplay.
- Hunger is maintained by eating food. Go to the bar or try a vending machine.
- If your hunger motive falls below 25%, your maximum health will be reduced by 20 points.
- There are water coolers around to keep you hydrated, but you can also head to the bar and ask the bartender for a drink. Bear in mind that high amounts of ethanol will dehydrate you.
- If your thirst motive falls below 25%, your stamina regeneration will fall to 3 units from 8 units.
- Hygiene is maintained by washing your hands and taking a shower. Make sure you don't have anything in the uniform or suit inventory before taking a shower, and walking instead of running will prevent slipping on wet floors.
- Hygiene doesn't currently have a mechanical penalty for being too low; but it could potentially increase the frequency at which diseases are acquired and transmitted with the re-enabling of Pathology.
Not maintaining your motives will prompt occasional messages in your chat window (e.g. You feel faintly hungry.) and will persist until the motive is back above a certain threshold. Certain objects, reagents, and activities will affect motives, e.g. being covered in dirt will reduce your hygiene. Failing to stay hygienic will make you terribly smelly and gross. If your uniform or clothes are dirty you can find a laundry machine and stuff them in there.
On the RP server, you also can also speak through LOOC, accessible via Alt + L, which sends a message to all the people you can see. It's generally meant for out-of-game stuff, e.g. asking for help or notifying you have an issue when you can't find a way to phrase it in character (e.g. "My N key is broken, BTW" or "Which intent do I use?"). LOOC is also good for stuff regarding roleplaying, like asking for consent to take roleplay in possibly questionable direction ("I'm thinking of RPing accidentally killing you during this boxing match, are you fine with that? I'll still try to get you revived.") or requesting some clarification (e.g. "Are you really mad at me or are you just roleplaying your character being mad?")
Remember to read the rules for the roleplay server!
Before and After Rounds
Once the round ends, which usually is when emergency shuttle reaches Central Command, and the various Antagonists and miscreants are revealed, the server restarts. The server then begins preparing a fresh new round, and players have a few minutes to press Declare Ready so they play as soon as said new round begins. During these few minutes, Out-of-Character (OOC) Chat is enabled, and players are free to talk about the previous round and the good/bad things that happened, ask questions about game mechanics, or just chill and talk about whatever comes to mind, so long as it follows the rules. You can join in and talk in OOC by pressing ALT+O or just pressing O on WASD Mode. T also works, although it'll work if you're in the lobby, which is where you end up when you first connect to one of the servers.
Job Prospects
We not only want you to appreciate the variety and depth of our mechanics, but also enjoy the spirit of experimentation and discovery at the heart of Goonstation. Obviously, you can't experiment if you have no clue if a mechanic works in the first place, so you have to start somewhere. Good newbie jobs provide that start; they should be simple to pick up, so you aren't too overwhelmed and can ease into more complicated mechanics, and low-consequence, so you aren't too discouraged by failures and can easily try again.
In addition, they should try to minimize boredom. Even in a paranoia-laced sandbox like SS13, there are always periods where there's simply nothing to do. Some people can't handle them and drop out before the round's fully over. Some try to create their own fun, sometimes constructively, sometimes not. A few even enjoy them, as they're great opportunities to experiment with things. Ideally, a good job (in general, not just for newbies) should encourage or at least capitalize on the third, but in the end, it still really depends on the person.
Good jobs to start out as:
- Staff Assistant - You have no responsibilities or obligations whatsoever, so you pick up and learn game mechanics as you wish. You're also generally ignored.
- Bartender/Chef/Janitor/Chaplain - These jobs are all simple and few (if any) will mind if you don't have a clue what you're doing. The first two in particular make excellent introductions to the wonderful world of Chemistry.
- Botanist - The rest of the station tends to forget that hydroponics exists, and the botanists are usually relaxed people who don't mind idle chat while they wait for their weed to grow. It's a good place to hang out and learn from others without having any expectations to meet, while still having plenty of things you can do.
- Mechanic - A good job for experimenting with various systems, with few particular essential duties. There's plenty of machinery and gadgetry for you to scan, reverse-engineer, and deploy. MechComp can be intimidating at first, and it requires a few levels of creativity sometimes, but it's one of the most powerful game mechanics in Goonstation, right alongside Chemistry.
- Geneticist - DNA sequencing is quite easy and unlikely to disrupt anyone else. There are loads and loads of mutations to discover and activate, so it's unlikely you'll get bored.
- Miner - A great opportunity to practice getting suited up and moving around in space, or rigging and piloting a pod. Maybe best not for your very first game, though, as suffocation isn't pleasant.
- Lawyer/Barber/Tourist - "Jobs of the day", of which one may be available on any given day. These resemble chaplain or assistants in that they are low-access, zero-responsibility, roleplaying roles. The same applies to most gimmick jobs (musician, diplomat, salesman etc), which are available at random.
The following jobs have standard duties, but they are not difficult if you consult their wiki pages or other players in the same job:
- Engineer - Expected to start the engine, but only one engineer is usually needed to do this, and otherwise the job is relatively free.
- Chief Engineer - Combines engineer, mechanic, quartermaster and miner with a bit more access and some new toys, but no extra duties. Some engineers might decide to treat you as if you're in charge, but you don't have to be.
- Roboticist - Expected to provide power cells for robots and make people into cyborgs.
- Head of Personnel - You control everyone's job and access assignments. You don't need to do anything, but you'll probably be asked to do plenty!
Eventually, you might want to be:
- Captain - Surprisingly, you don't have to be really competent to do this. Your only real obligation is to protect the authorization disk in your pocket. Don't be an officious jerk, no one likes those, and try your best to protect your crew. Other than that, you get to explore (nearly) everywhere on the station and do basically any job activity you want.
- Cyborg - You get access to everything, but your interface is different than normal and you're expected to follow the AI laws, meaning you can't hurt anyone even if they're attacking you!
- Quartermaster - You're expected to manage the station's budget and attempt to turn a profit. It's a good idea to have an idea how storage and manufacturing work.
- Medical Doctor or Medical Director - Expected to heal the wounded. This is more complicated than other duties and your patient can die if you screw up. Medical Director combines medical doctor, geneticist, and roboticist.
- Scientist - You get to study artifacts, investigate different mixes for heating plasma mixes, and experiment with various chemical mixtures. You can also do Telescience and explore the Adventure Zone. Risk of death is fairly high, but vital to the learning. Tends to be a fairly popular job, so you can reasonably expect to find a fellow coworker to help you out.
- Research Director - Combines scientist with head of staff access.
- Antagonist roles - Once you've got the hang of how the station works you'll probably want to think about checking antagonist roles. Checking the box will make the option show up red rather than black, which means you can now be chosen for that antagonist role. Checking them only puts your name in the hat - you are always unlikely to actually get them, simply because there are so few in each round compared to the number of players. Be prepared for your round to end early, as once you're known the entire station will be against you.
Jobs you should avoid for now:
- AI - AIs have a lot of annoying restrictions and responsibilities. If you don't know what you're doing expect everyone to scream and hurl abuse at you.
- Security Officer - Don't pick this as a starting player, please! Essentially, you're a cop. You need to have an understanding of station systems (death/beating is not an appropriate sentence for most crimes, so you need to know how to give tickets/fines and use the brig), know the mood of the game (you must know when it's best to let someone be, when some intervention might be good, and when you must absolutely punish people, which all depend on context and player tastes), and be able to handle combat (because when you meet a genuine bad guy you'll have to fight them). Since you're constantly interacting with others you can very easily ruin other people's rounds. This job invites the most scrutiny, is often in the most danger, and really sucks for everyone if you are terrible or don't really get the "mood" of Goonstation.
- Detective - Similar to the security officer and so probably not ideal for a starting player.
- Boxer - All you can do well is punch people, and that will just get on their nerves.
- Clown - Actually, come to think of it, you should probably avoid this job forever.
- Head of Security - For the same reason as the security officer, and can't actually be picked by new players anyway.
Note: There is no skill system on Goonstation. Any player can do any job and operate all equipment on the station at full competence; your job for the most part only determines the areas of the station you have access to and the equipment you start with. There are certain exceptions, such as complex tasks that have a variable failure chance. For example, surgery is less likely to go wrong if you are a medical doctor or another medically related job, and the opposite is true if you're a clown or similar untrained personnel.
One last thing
Make sure you've read the Goonstation rules! They allow everyone to have fun and are different from other SS13 branches. Not reading the rules is a bad idea! If nothing else, pay special attention to rules 1, 2 & 4, the rules that get violated most often.
Besides that, you should be fine. Aside from an incredibly rare, exceptionally rude few (or yourself, if you're that kind of person), most people don't really care if you haven't a clue how to switch hands or put on internals, much less how to fight or set up the engine.
Also if things go wrong with your game then please read the Game FAQ! There are numerous things that can go wrong with BYOND, SS13 and your computer, and if they do please take a look at the Game FAQ to try to solve your problem, or ask a question on mentorhelp/the crew over the radio if your issue isn't answered there.
| Game Mechanics | |
|---|---|
| The Basics | Getting Started · Super Quick Tutorial · Rules · Game FAQ · Quick guide to station systems · Mentorhelp · SpicyChickenGod Tutorials |
| Critters | |
| Game Abstractions | |
| Miscellaneous | |