Miner: Difference between revisions
Studenterhue (talk | contribs) Split off Gettin' to work into more sections, add a section for mining on Oshan Lab and instructions on using internals |
→Exploring the Trench: trench elevator starts with a GPS placed there, unique ident |
||
| Line 93: | Line 93: | ||
All set? Good. Go ahead and make your way to the Trench. If you're feeling brave, you could drive a minisub or simply walk into the deep hole northwest of [[Mining Department#Oshan|your department]]. (The latter is surprisingly survivable.) Or you can make a drive/trek a little bit north and hitch a ride on the [[Sea Elevator#Oshan|Sea Elevator]]. Once you're there, just start mining! Break up rock with your power pick/concussive charges, pick up ores and gems with your ore scoop, haul them back to the [[Mining Department#Oshan|Mining Department]], refine them into better gear, the usual. | All set? Good. Go ahead and make your way to the Trench. If you're feeling brave, you could drive a minisub or simply walk into the deep hole northwest of [[Mining Department#Oshan|your department]]. (The latter is surprisingly survivable.) Or you can make a drive/trek a little bit north and hitch a ride on the [[Sea Elevator#Oshan|Sea Elevator]]. Once you're there, just start mining! Break up rock with your power pick/concussive charges, pick up ores and gems with your ore scoop, haul them back to the [[Mining Department#Oshan|Mining Department]], refine them into better gear, the usual. | ||
Just try not to get lost. If you're in a minisub, it's hardly a concern, since, again, you can just make a wormhole back to any of the [[Pod Bay#Oshan|station's hangars]] if you stray too far. If not, be careful. Stay close to the base of the [[Sea Elevator#Oshan|Sea Elevator]] if you know you have no sense of direction, or make a trail of "breadcrumbs" (like with the random rocks you mine or the [[General Objects#Emergency Glowstick|glowsticks]] at the bottom of the [[Sea Elevator#Oshan|Sea Elevator]]). Those [[Guide to Mining#Space GPS|Space GPS units]] in your [[Mining Department#Oshan|your department]] are godsends here. | Just try not to get lost. If you're in a minisub, it's hardly a concern, since, again, you can just make a wormhole back to any of the [[Pod Bay#Oshan|station's hangars]] if you stray too far. If not, be careful. Stay close to the base of the [[Sea Elevator#Oshan|Sea Elevator]] if you know you have no sense of direction, or make a trail of "breadcrumbs" (like with the random rocks you mine or the [[General Objects#Emergency Glowstick|glowsticks]] at the bottom of the [[Sea Elevator#Oshan|Sea Elevator]]). Those [[Guide to Mining#Space GPS|Space GPS units]] in your [[Mining Department#Oshan|your department]] are godsends here. The [[Sea Elevator#Oshan|Sea Elevator]] begins each round with a GPS inside - identifier "NT-E". When you're lost, you will at least know where the way back is. (Though actually getting there safely is another thing entirely.) | ||
====Mining Hotspots==== | ====Mining Hotspots==== | ||
Revision as of 05:49, 3 October 2018
You haul 16 tons and what do you get? Radiation poisoning and blown up, most likely. The Miner is a special engineering role that starts in the Mining Department and braves the void of Space (or the depths of the Trench on Oshan) to procure ore for the station. With their easy and reliable access to plentiful amounts of ore, they make also great blacksmiths and craftspeople and are often enlisted for deep-space expeditions into the Debris Field, Mining Level, and beyond.
Your purpose in life
Being a miner is a mostly solitary job amidst cold space, but a skillful mining shift can be of enormous benefit to the station, gathering precious ores by the hundreds. Quartermasters, roboticists, and mechanics will always be thankful for the proper materials for their job, and people using the public arc smelter will be besides themselves with excitement when you bring them cool, new materials.
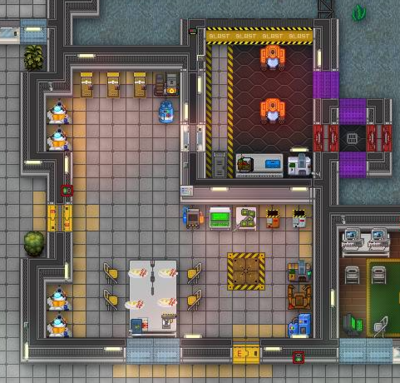
You also get a Quantum Telescope in your department so you pull in particularly mineral-rich asteroids. Expect the Research team to come knocking at your door to use so they can configure the long-range teleporter and go to all the cool hip locations.
Miners are equipped with the yellow-striped engineering headset to stay in touch with each other. To use it, simply type:
say :e I'm gonna use a mining charge, watch out!
Gettin' to work
As a miner, your biggest preoccupations are going to be harvesting as much ore and as many gems as humanly possible, moving those things to where they're useful, and blinging yourself out with the coolest stuff the mining fabricator has to offer. The exact means of obtaining of this will depend on the map you're on:
Note: In any case, the majority of ore and gems won't be usable in the mining fabricator unless you process them with the material processor or its portable version first. Not everything should be immediately processed, though; sometimes, it's better to leave it raw for the Quartermaster to sell. Check out the Guide to Mining for more info.
Cog1/Cog2/Destiny/Clarion: The Mineral Magnet

On most stations, you bring the ore to you rather than bring yourself to the ore; that is, you pull mineral-bearing asteroids (and occasionally wrecks) into the Mining Department with the mineral magnet and harvest the ores contained within. Not only is it safe, reliable, and easy to use, but it also means you're closer to both the people who directly benefit from your work and the people who can save you when you're hurting, burnt, and mildly radioactive.
Gearin' Up
Your primary gear is a space suit, a jetpack (goes on your back), a mining belt (goes on your waist), and a pair of optical meson scanners (goes on your eyes). Other essential equipment includes ore satchels, concussive charges, a geological scanner and a powered pickaxe. You can take whichever of these you will need and put them in your pockets or the mining belt.
Make sure you have a breath mask (or equivalent) on too, so you can actually link up with the air supply in your jetpack. To turn internals and start breathing in the oxygen in your jetpack so you don't asphyxiate, click on the Toggle tank valve icon on the top left.
Alternatively, claim a mining pod instead and upgrade it with better sensors, ore scoop, and magnet link array. Though you won't be able to mine rocks until you get a hold of some plasmastone for plasma cutters, you'll collect ore astonishingly quickly, especially if you have the other miners break rocks while you scoop up the ores.
Using the Magnet
All set? Great! Exit the airlocks, take a short walk on the catwalks, and find the mineral magnet's control terminal (it's often in its own little shed with a bunch of other machines.) Pull in an asteroid and start mining! If you're in a pod, use the remote control to interface with the magnet directly. You can only pull in asteroids so often, unless you enable the override. There is also an automatic mode, which (if there aren't any obstructions) activates the magnet as soon as the cooldown has finished. Beware: uncollected ore is lost in the process!
Particularly math-savvy miners may want to try out the quantum telescope. This nifty computer allows you to pinpoint and pull in especially mineral-rich asteroids, including erebite and miracle matter asteroids! To use to it, click the Scan button to get a list of interesting objects to home in on. Select a Celestial Object to focus in on, click on a location on the map, and click Scan. It'll then give you the distance to the object but not the direction, so you usually need to click and scan more locations to get a better bearing, sort of like a galactic Marco Polo with space rocks (particularly geometry-savvy miners may be able to use triangulation to get faster results).
If you can get within 25 LY of the asteroids, you'll see a little asteroid icon. Click on it and then the Track button in the lower right to automatically its location to the mineral magnet controller. You can then pull in in via Activate telescope Location and mine it to your heart's content.
Maintenance is required at regular intervals - simply use a welding tool on the mineral magnet to repair minor damage. In case of severe structural damage, the wiring has to be replaced with a cable coil first. If it has suffered catastrophic damage, replacement parts are required to build a new magnet by using the existing chassis.
Oshan Laboratory: The Trench
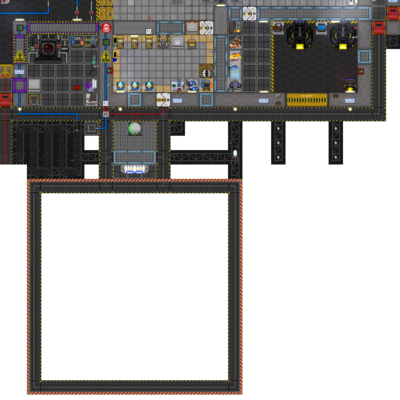
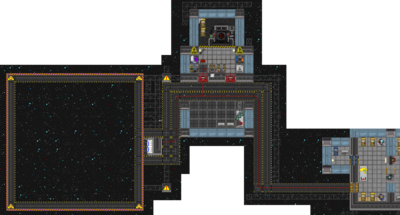
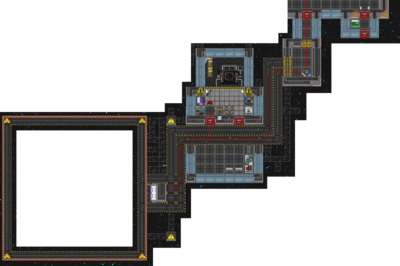
If you're on Goonstation's newest (at this time, at least) map, Oshan Laboratory, you'll be kicking it old school by exploring a whole another Z-level, the Trench for ores and minerals. It's dark, cold, and easy to get lost in, but if you find your way, great bounties and wonders await.
Suiting Up
Your primary gear is a mining belt (goes on your waist), a pair of meson goggles (goes on your eyes), a tank of oxygen (handily color-coded blue for your convenience) from the tank dispenser (can stay in your hand, but can also fit on your back), and a diving suit. You can keep your backpack on this time around. As for footwear, you have a choice between magboots for less knockback when moving in and out of the water and flippers for faster movement speed underwater. Most people prefer the latter.
Don't forget to put on a breath mask too and click on the Toggle tank valve icon on the top left so you can breathe in the air from your tank. You'd be surprised how new miners have died from not knowing how to turn on internals.
Other essential equipment includes ore satchels, concussive charges, a geological scanner, and a powered pickaxe. A Space GPS or two is optional, but it might just save your life if you get lost. You can take whichever of these you will need and put them in your pockets or the mining belt.
It's also a good idea to claim a mining minisub and outfit it with better sensors and ore scoop. Its starting Mining Phaser System is okay at breaking rocks but piss-poor against ore, but it's nevertheless superb at collecting, especially if you let the other miners mine out the actual rocks while you scoop up the ores with your little minisub. Not to mention, if you get lost or stuck in a bad situation in the Trench, you can just warp out!
Exploring the Trench
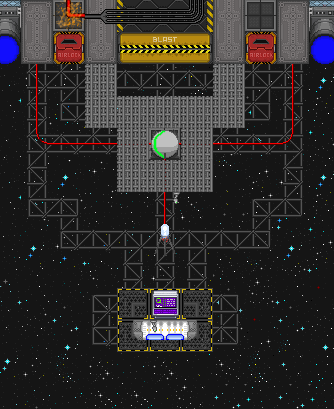
All set? Good. Go ahead and make your way to the Trench. If you're feeling brave, you could drive a minisub or simply walk into the deep hole northwest of your department. (The latter is surprisingly survivable.) Or you can make a drive/trek a little bit north and hitch a ride on the Sea Elevator. Once you're there, just start mining! Break up rock with your power pick/concussive charges, pick up ores and gems with your ore scoop, haul them back to the Mining Department, refine them into better gear, the usual.
Just try not to get lost. If you're in a minisub, it's hardly a concern, since, again, you can just make a wormhole back to any of the station's hangars if you stray too far. If not, be careful. Stay close to the base of the Sea Elevator if you know you have no sense of direction, or make a trail of "breadcrumbs" (like with the random rocks you mine or the glowsticks at the bottom of the Sea Elevator). Those Space GPS units in your your department are godsends here. The Sea Elevator begins each round with a GPS inside - identifier "NT-E". When you're lost, you will at least know where the way back is. (Though actually getting there safely is another thing entirely.)
Mining Hotspots
On occasion, the Engineers may ask you to mine out certain hotspots so they can boost geothermal power generation. It's very simple. Wherever the Engineer says the hotspot is according to the GPS unit, go to its corresponding location in the Trench and mine out the rock there. The more, the merrier. For instance, if a Engineer says to mine out a hotspot at (89, 201), you've to go to wherever (89,201) is in the Trench and break apart the nearby rock. If you see sparks fly off the rock as you break it or hear a hissing noise like a steam boiler going off, that means you've struck a hotspot.
The only difficult is actually getting there. If you're having trouble, try focusing on one axis/direction at a time.
Sturdy Metal, High Energy Conductor?! Help!
For a description of advanced mining equipment and the various ore classifications, check out Guide to Mining.
Profiting
If the warmth and affection of your fellow station crew isn't enough to motivate you, miners have some other incentives to do their dirty work.
- Using your ID card on a barcode printer will add your bank account information to any barcodes printed. A crate marked this way that ships from the cargo bay will split the sale profits with you, directly depositing to your account.
- The quartermasters themselves can occasionally get their hands on stuff that is useful to you, and generally look for a fair trade.
- Special ores are required for a lot of higher-end gear and constructions. Cool pod equipment and custom alloys are some of the best stuff you can get through the work of miners.
- Miners are also in a good position to go on salvaging missions in deep space, finding cool loot and making money in more dangerous, but also more exciting conditions.
Crew objectives
As a loyal crew member, you can sometimes be assigned some strictly optional objectives to keep yourself busy while you wait for something to happen. Miners can expect to see the following:
Find at least 10 gems among all miners
Just go out and slap concussive charges on thick veins, the gems will pop out almost on their own. You merely need to reveal them to complete this objective, they do not need to be shipped to the station.
Create at least 3 suits of industrial space armor
You want one for yourself anyway, so if you're of a mind to complete this objective, just get some more uqill and run the fabricators.
Syndicate miners
By default, a miner has access to EVA gear and top-quality internals, a remote area to spawn their items, and the ability to manufacture toys that the rest of the station does not easily get. Miners often have access to other identities, whether due to their colleagues spawning brain dead or by a quick murder of a co-worker out in the unforgiving void of space. Use your cool gear for hit-and-run style attacks on the station, retreating into the depths of space before sec can nab you.
The miner also has access to a special mining charge hacker. It turns regular mining charges from concussive to explosive and allows you to stick them onto anything (walls, floors, etc.) Mining charges are cheap to produce and you can carry several on your belt at once, so you do the math. A little bit of regular mining work will pay off as well. The mechanical boots will let you avoid security and vigilantes in space, and an industrial armor set will let you safely blow things up at point-blank range. A well-equipped mining traitor is basically an one-man nuke ops team. Make sure to gloat as you hold the station at your mercy.
Supplementary video
| Jobs on Space Station 13 | ||
|---|---|---|
| Command & Security |
||
| Medical | ||
| Research | ||
| Engineering | ||
| Civilian |
| |
| Silicon | ||
| Jobs of the Day | ||
| Antagonist Roles | With own mode | |
| Others | ||
| Special Roles | ||
