Engineer
Engineers have access to a large supply of tools and equipment geared towards modifying and repairing the station. They begin the round near the engine, and their primary job is making sure that the station remains powered. This is usually done by running the Thermo-Electric Generator. Do note that experimenting with the generator may cause side-effects such as horrible burning and death.
Power to the People
Generation
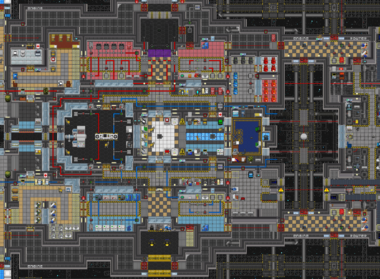
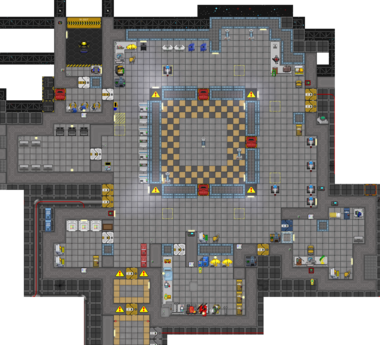
Obviously, for the station to be powered, there has to be something generating power in the first place. There's quite a few ways to generate power, all which are detailed in Powering the station, but the main source of power is the station's engine, which is located in, as you'd expect, Engineering, and depending on the map, that engine is either the Thermo-Electric Generator or the Singularity.
The Thermo Electric-Generator
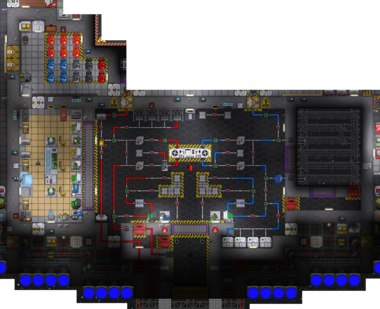
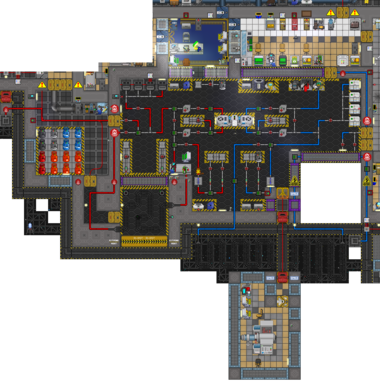
Cogmap1, Cogmap2, Destiny, and Clarion's main means of generating power. This page section will give you a primer on how to get the engine running. Short version:
- Get any gas flowing in the two gas loops that meet in the Thermo-Electric engine in the middle of Engineering.
- You want the top loop to be real hot and the bottom loop to be real cold. The temperature difference is what generates power. People usually focus on heating the hot loop.
- The hot loop can be heated by connecting hot gas to the loop in the first place, by burning fuel in the furnaces, or by getting a fire running in the combustion chamber.
- The cold loop mostly cools itself by a coil exposed to space.
- Be careful with pressure. Get it too high, and the pipes will burst.
- Don't forget to open valves as needed to get the gas going where it needs to go.
You think that looks hard? Older stations used to be powered by a contained black hole. We're better off now than those weird Linemap people.
The Singularity
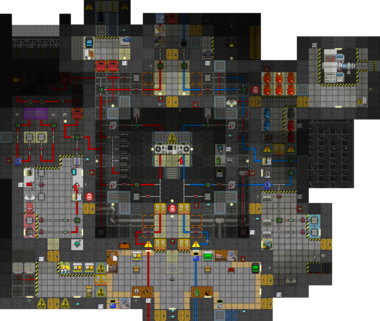
Oh boy! You're on Linemap! That means you don't get to work in a blistering-hot hell-inferno like those other stations and ships. Instead, you work six feet from the edge of a bottomless abyss, using the power of the void to keep the lights on. This page section will give you the rundown on how to harness the all-consuming empty and setup the singularity. Short version of that:
- Secure down the emitters, field generators, collection arrays, array controllers, and singularity generator in their proper positions.
- You'll want the field generators active, because those things keep the singularity contained, and collection arrays on, because the arrays harness the particles given off by the blackhole and use it to make electricity.
- The field generators remain active so long as they receive energy beams from an emitter.
- A singularity is generated once the containment beams generated by the field generators are of a valid size.
- Don't stare into the singularity without mesons if you like your eyes.
- Don't stand around the singularity if you don't have magboots, unless you like falling on your face.
Power Distribution
Once the engine is up and running, and the solar arrays are receiving starlight, the power generated by the engine then goes through wires connected to SMES units, which distribute a configured amount of power throughout the station to APCs, which control the machines, lights, and other immobile electrical devices in their designated rooms.
SMES Cells
Superconducting magnet arrays that use the principle of electromagnetic induction to store energy. Charging these to full isn't really a top priority, but the rest of the station receives power from these SMES units, so properly configuring them is important. The precise numbers are different for each station and engine setup, but a good configuration setting is little under half of the engine's output as SMES input (to counter fluctuations), and half of that as SMES output (to charge the SMES).
With some fairly basic wiring knowledge, it is possible to bypass the SMES units altogether, a practice known as hotwiring. Hotwiring generally means the station is receiving more power at higher safety risk, which scales with the amount of power being generated. Hotwiring the solars arrays is almost always safe, with hotwiring the singularity or a basic low-power thermo-electric generator setup being slightly more dangerous. Hotwiring an advanced TEG setup that generates tens or hundreds of MW and more, however, is very likely to overload the station power network, potentially causing APCs to spontaneously shock people and electric shocks to seriously hurt, so you generally shouldn't do that unless you're an antagonist.
APCs
Area power controllers, little white panels that control the electricity coming into a room, much like a fusebox or circuit breaker panel. These are usually located in maint tunnels, but more secure locations will have them actually be inside the room it controls. When you click on one, it opens up an interface with oodles of info:
- Main breaker: Controls whether the room is getting power at all. Best not to mess with this, unless it actually is your job to mess with this.
- External power: Indicates if the room is receiving power and a qualitative description of how much. Good means it's receiving more than enough power, Low not enough, None no power at all.
- Power cell: Indicates the charge levels of the APC's backup internal cell. If the APC loses connection or receives inadequate amounts of power, it'll drain the cell until it runs out and all the electrical devices in the room lose power.
- Power Channels: Indicates how much power various categories of devices in the room are consuming and their power settings. On/Off are self-explanatory, Auto means the devices in the category will stay on if there is enough power is available and shut off to let other less power-hungry devices function if there is not.
- Equipment: For computers, manufacturers, vendors, dispensers, conveyor belts, things like that.
- Lighting: For light tubes and light bulbs, but not the emergency lights.
- Environmental: For fire alarms and firelocks, as well as emergency lighting.
- Total Load: The total power consumption of the electrical devices in area controlled by the APC.
- Cover lock: Indicates whether the APC's settings can be changed and whether the APC panel can be pried open with a crowbar or not.
Swipe your ID on the APC to disengage the cover lock and make the Main Breaker and Power Channels settings configurable. You'll need to do disengage the cover lock and mess with the Power Channels settings from time to time if the solars and engine aren't generating and sending enough power. In drastic/urgent cases (e.g. powering Medbay or Cloning after a power sink is removed), you might need to disengage the lock, pry open the APC panel, and insert a fresh fully-charged cell to repower a room.
Alternative Power
If the engine breaks, the station can fall back on the solar arrays. They're pretty much maintenance-free once the SMES units are set up or the solar panels are hotwired (i.e. the wires go from the solar panels straight to the station, rather than going through a SMES). However, if the wiring for the solars breaks for any reason, repairing it falls under your responsibility. Be sure to head over to the relevant page section to learn the correct SMES configurations and/or tips on hotwiring the solars.
Repairing the Station
Main guide: Construction
The Engineering department's other real job is repairing hull breaches and damage. To repair a hull breach, you'll require rods and floor tiles, both of which can be made from metal. You should also get a pair of internals and complain at the CE until he gives you a spacesuit. To repair the breach, use the rods on the space tile to form a lattice, and then the floor tiles on the lattice to finish the floor. Once totally sealed, garnish with space heaters so people can walk through the area without slowing to a crawl.
You may also need to make walls to fully seal a breach. To do this, you'll require a stack of metal (and optionally rods). Open the metal's construction window and select Wall Girders. Once they've been build, use metal on them to form a wall. You can also use reinforced metal for the plating, which you can make by combining regular metal sheets and rods. If you want to make a false wall, use a crowbar on the girder first to dislodge it, then apply the plating.
Now, once you've fully sealed the breach, you might want to repressurize the room so that people aren't suffocating and gasping for air as they walk through the place. Depending on which area you've sealed, there may be a corresponding Emergency Air Hookup for it, where you can just connect the air canisters to the relevant ports and turn the relevant valves.
If not, you'll have to do it manually by bringing in some air canisters. Don't just open it and leave it out in one spot; all the air will accumulate in that one spot rather than spreading out. Instead, set the canister to a fairly high (600 kPA or more) and move the canister around from time to time so the air is (hopefully) evenly distributed through the room.
If you want the area to look like it didn't totally just explode, you'll want to learn how to replace broken floor tiles. To do this, just use a crowbar on the tiles that look burned, and then replace them with new floor tiles. It's not really an important skill to have, but it does make the station look less like a death trap.
Now What?
Once it's set up, one person can handle the engine safely, and most of the time, there are no hull breaches. So, it's time to get up to some mischief, since you've got nothing better to do. To start with the basics, Door Hacking. You'll need a multitool, a screwdriver, insulated gloves, and a crowbar. A wirecutter could also come in handy. Open the door's faceplate with the screwdriver, then click with an empty hand. A window will come up. Minimize it and take out your multitool. The window will show a bunch of wires with buttons for Cut, Pulse, and Attach Signaller on them. Start from the top, and begin pulsing wires. Pulse each one once. There are notifications at the bottom for Power, Bolts, and AI control. If you trigger a Power wire, you can use the crowbar on the door to open it. Power will be down for 10 seconds, and then backup power will trigger. Pulsing the backup power wire will disable it for 1 minute. If the bolts go down, then the door can't be opened. Pulse the same wire again to undo the bolts. The Bolts can go down at all times, but can only disengage if the power wires are operating. If you accidentally hit the bolts when the power is down, you might have to wait a minute to continue. It's also a good point that an engineer who is well versed in how hacking doors work, when provided the tools to do so have effectively all access to any portion of the station they wish. Nothing is better at stopping a corrupted AI than an insulated glove wearing Engineer who knows his stuff.
Another bad idea for Engineers is making and wearing Stungloves. To make a pair of Stungloves, take a pair of insulated gloves and use wiring on them. Then use the Insulated Gloves on a power cell to charge them. If you wear them and hit someone with the harm intent, you'll shock them. This sounds great (and it is), but stun gloves have an extremely obvious sprite and sometimes Security Officers will deem them as a weapon and arrest you to get them. If you do make some Stungloves, keep them in your backpack until things start blowing up. After there's been a few murder reports, even the most fascist Security Officers will be too busy to care about your gloves.
Treachery
Traitor Engineers often choose to wreak a little havoc using the AI as an assistant. With their easy access to tools and gloves, they can easily break in to the AI upload in order to give it a law that will send it on a bloody rampage. Care must be taken to not be stunned by the turrets (which you can't turn off), but some fast movement will let you succeed regardless. They also have normal access to the tools that people will use to build alternate AI upload consoles, and the backup Reset module, allowing them to steal or destroy these things before they are used. Engineers also have tons of access to odds and ends like timers and welding fluid, so they are able to construct a few pipe bombs to raise a little hell with impunity. The power transmission laser can also reach insane levels of power if enough watts are being sent out, to the point that contact results in immediate, absolute disintegration. The flow of the laser is fixed and consequentially can only be taken advantage of in particular places, but it makes for excellent corpse removal and a nice way of executing any stunned or unconscious victims.
Supplementary Video
| Jobs on Space Station 13 | ||
|---|---|---|
| Command & Security |
||
| Medical | ||
| Research | ||
| Engineering | ||
| Civilian |
| |
| Silicon | ||
| Jobs of the Day | ||
| Antagonist Roles | With own mode | |
| Others | ||
| Special Roles | ||
